Tutorial Blink led
Contributors: Owntech team in 2021 Loic Quéval, 2021.11.04 Antoine Boche, 2021.11.09
Required hardware
- O2 v_1_1_2
- STLinkV3
- PC (windows or linux)
- power supply (40 V, 2 A).
Required software
To use OwnTech's system, it is necessary to download:
- Visual Studio Code - The platform we will use to write code
- PlatformIO - A Visual Studio Code plugin we will need to send code to the micro-controller
Step-by-step implementation
- Visual Studio Code: Download Visual Studio Code, either from https://code.visualstudio.com/ or from the repository manager of your OS. Install it.
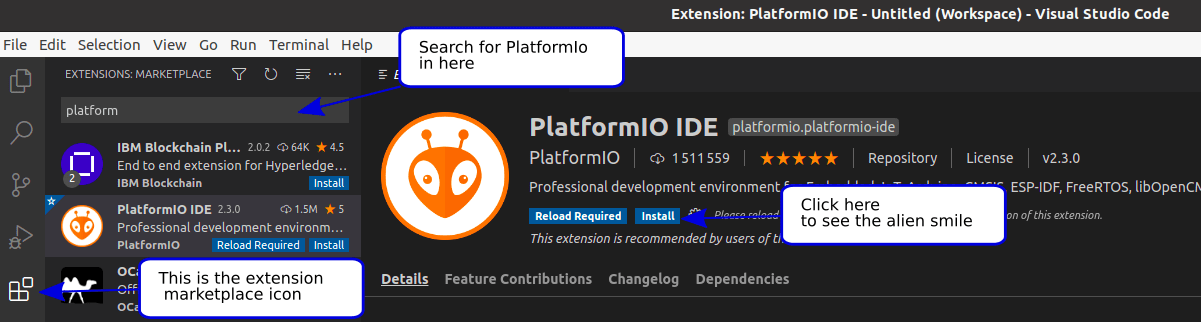
- PlatformIO: Launch Visual Studio Code. On the left side menu, click on the extension icon
 . In the search engine, type "PlatformIO IDE", and click install. Finally, restart Visual Studio Code when you are prompted to do so.
Now we will download the “blink led” code from Git to Visual Studio, and compile it.
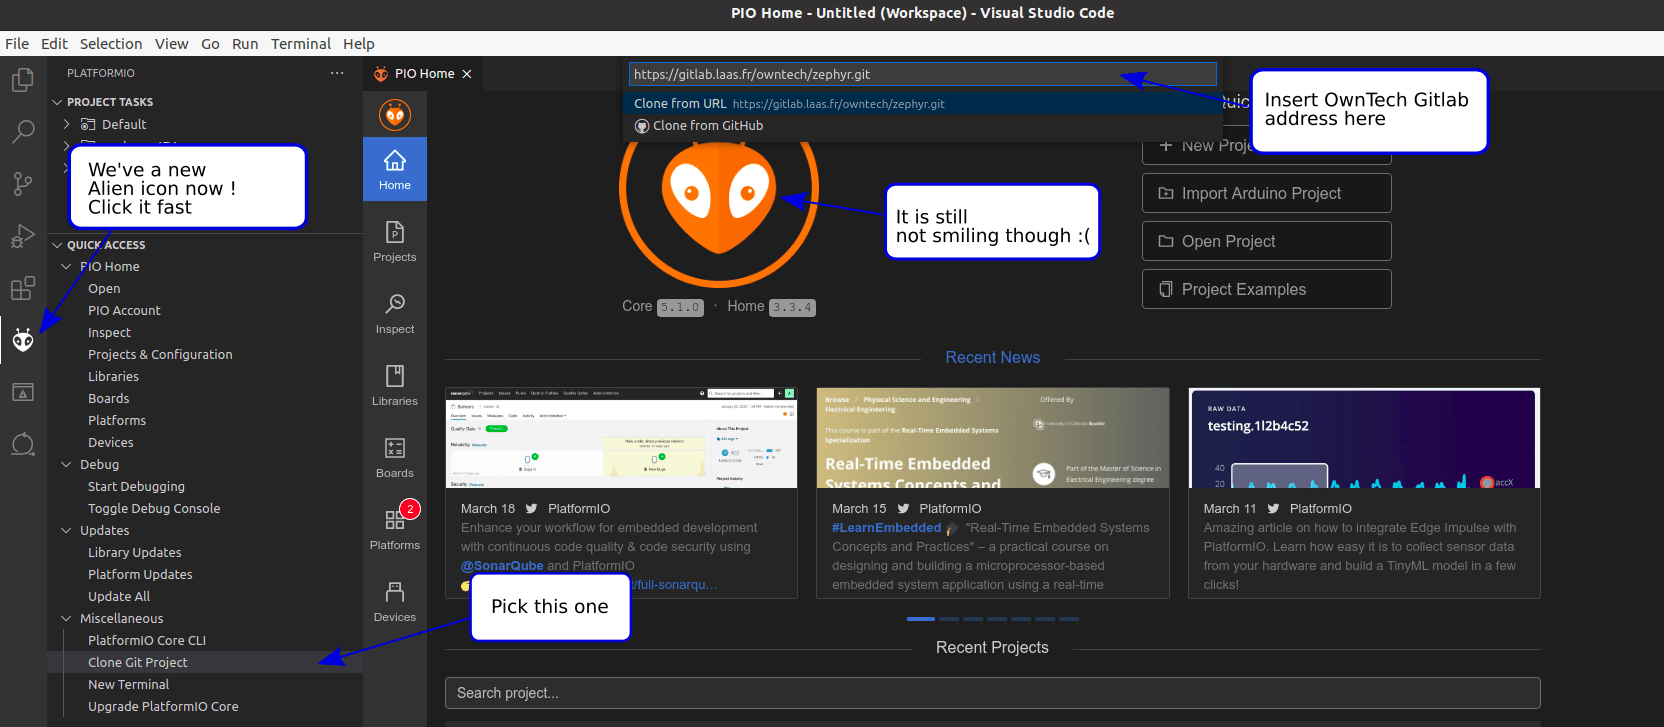
In Visual Studio code, on the left side menu, click on PlatformIO icon
 . Pro tip: if the alien icon does not show up spontaneously, press F1 key and type platformio home.
In Platform.io, select "Clone Git Project ". In the search engine, type https://gitlab.laas.fr/owntech/hackathons.git. A pop up appears, select Add to Workspace.
⚠ Make sure that the name of the cloned project has no space in its path as it would create issues. ⚠ Make sure that you have enough space on your hard drive so that PlatformIO can download all the required files without issues. ⚠ Make sure that you have administrator priviledges on the folder where you clone your repository. ⚠ Make sure that you have git installed on your machine.
- Make sure you are on the main branch of the Git project. You should see the following file tree.
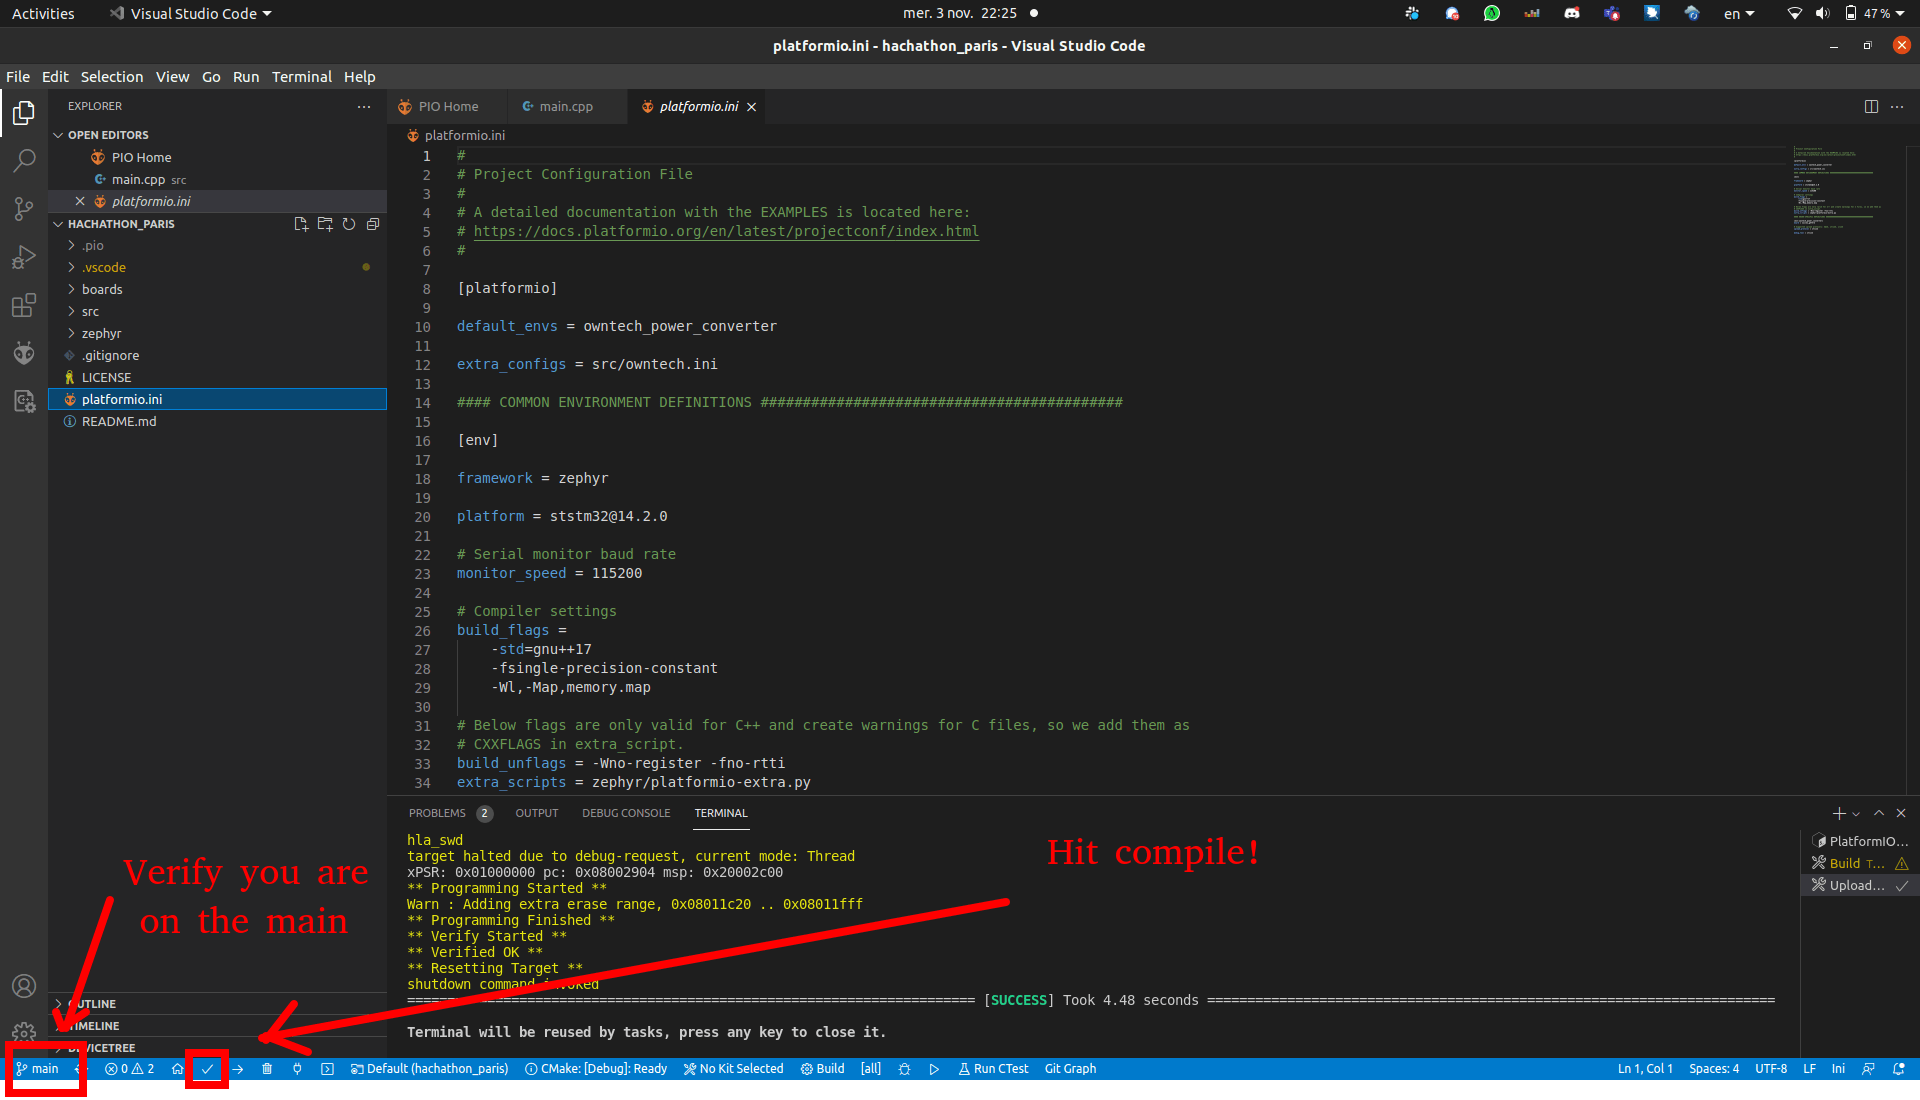
- On the bottom menu, click on the Build icon
 . This will launch the compilation of the code. If this is the first time that you compile, Visual Studio Code will download several extensions that are required to write the code onto OwnTech’s microprocessor. When the compilation is completed, you should see [SUCCESS] in the terminal.
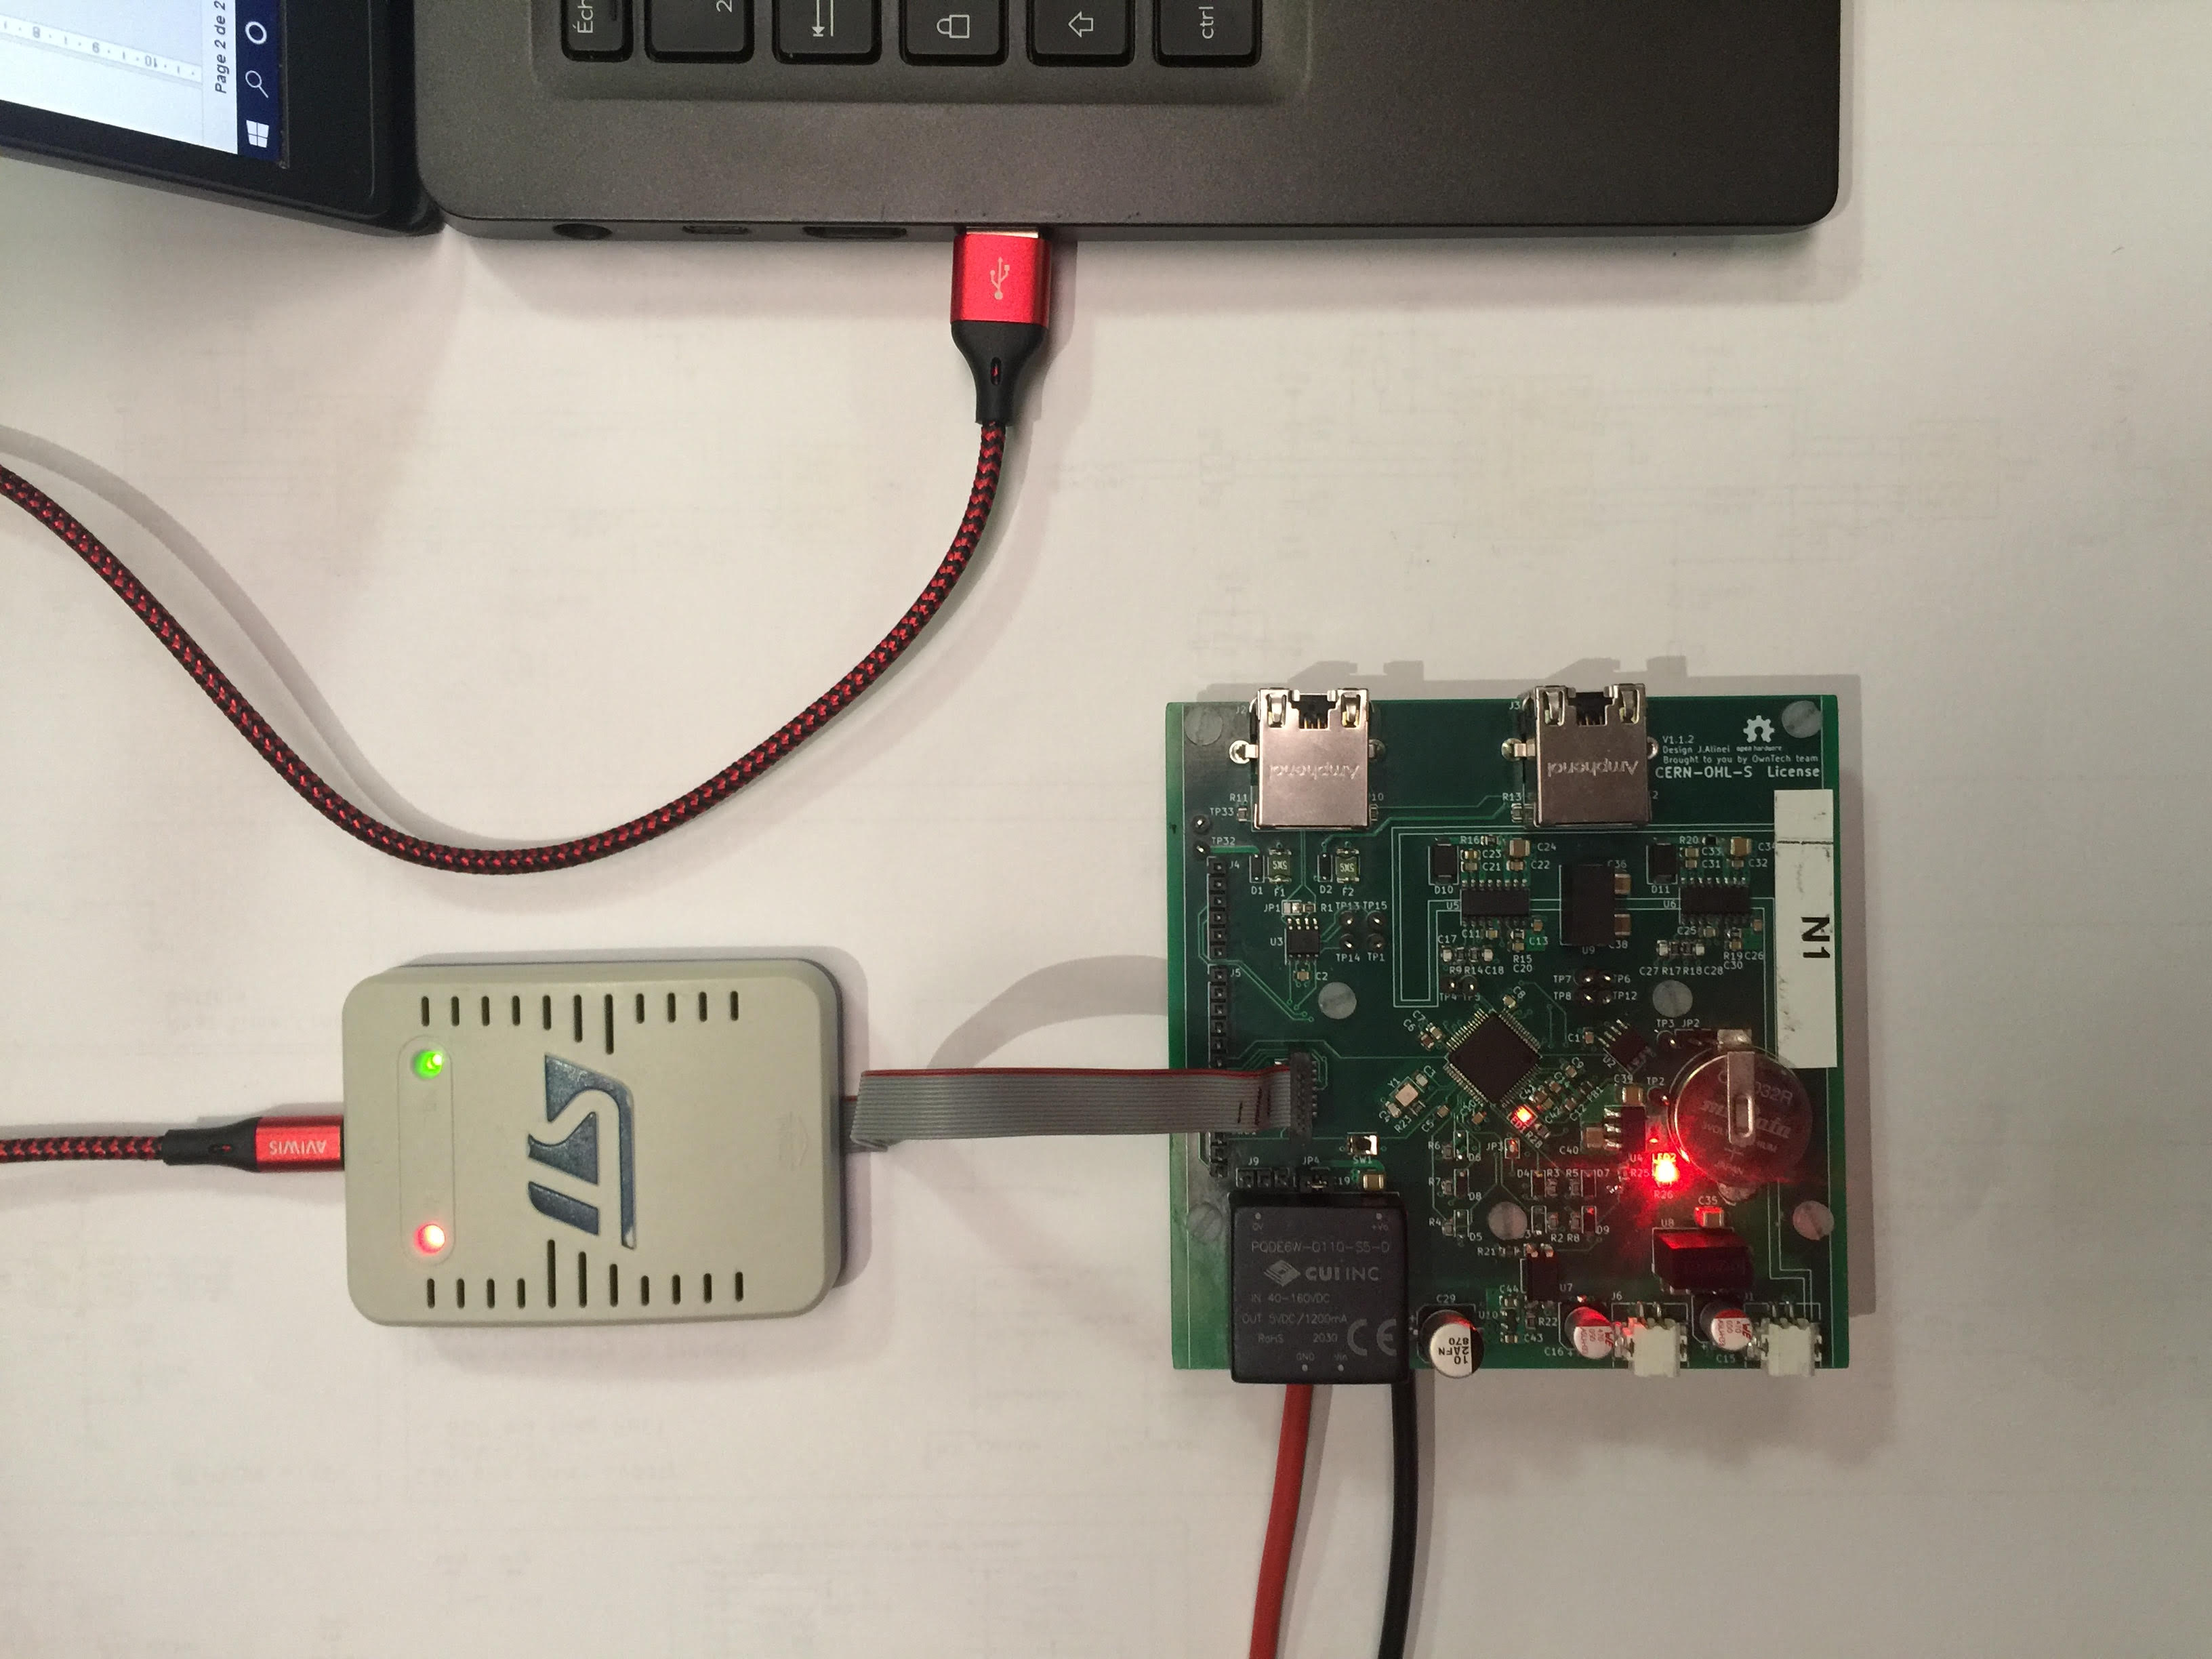
Now we will connect OwnTech’s O2 to the power supply and to the PC.
Connect the pins Vhigh and GND of the O2 to the 40 V power supply (set the current limitation at 1 A).
Connect the micro-JTAG connector of the O2 to the PC thanks to the STLinkV3. The leds PWR and COM should be ON.
Switch on the power supply. The led2 of the O2 should be ON.
On the bottom menu, click on the Upload icon
 . This will flash the compiled code on the microcontroller of the O2. When the process is completed, you should see [SUCCESS] in the terminal.
The led1 of the O2 should blink. You can change the blinking frequency by modifying the input of the k_msleep() function in the file src/main.cpp.
On the bottom menu, click on the Serial Monitor icon
 . The O2 is printing “Hello world” in the terminal.
That’s it!