Prerequisites
This configuration is only possible on windows since there is no version of STM32 Mat/Target for Linux.
- The examples given by ST are device specific, hence you should know that this tutorial has been made with a Nucleo-G474RE.
Before starting this tutorial you need to have installed Matlab with at least the Simulink and Embedded Coder packages.
Objective
There are many ways to implement Code on the microcontroler from Matlab, I will present a way with the following software (except Matlab they are free) :
- Matlab (2020b)
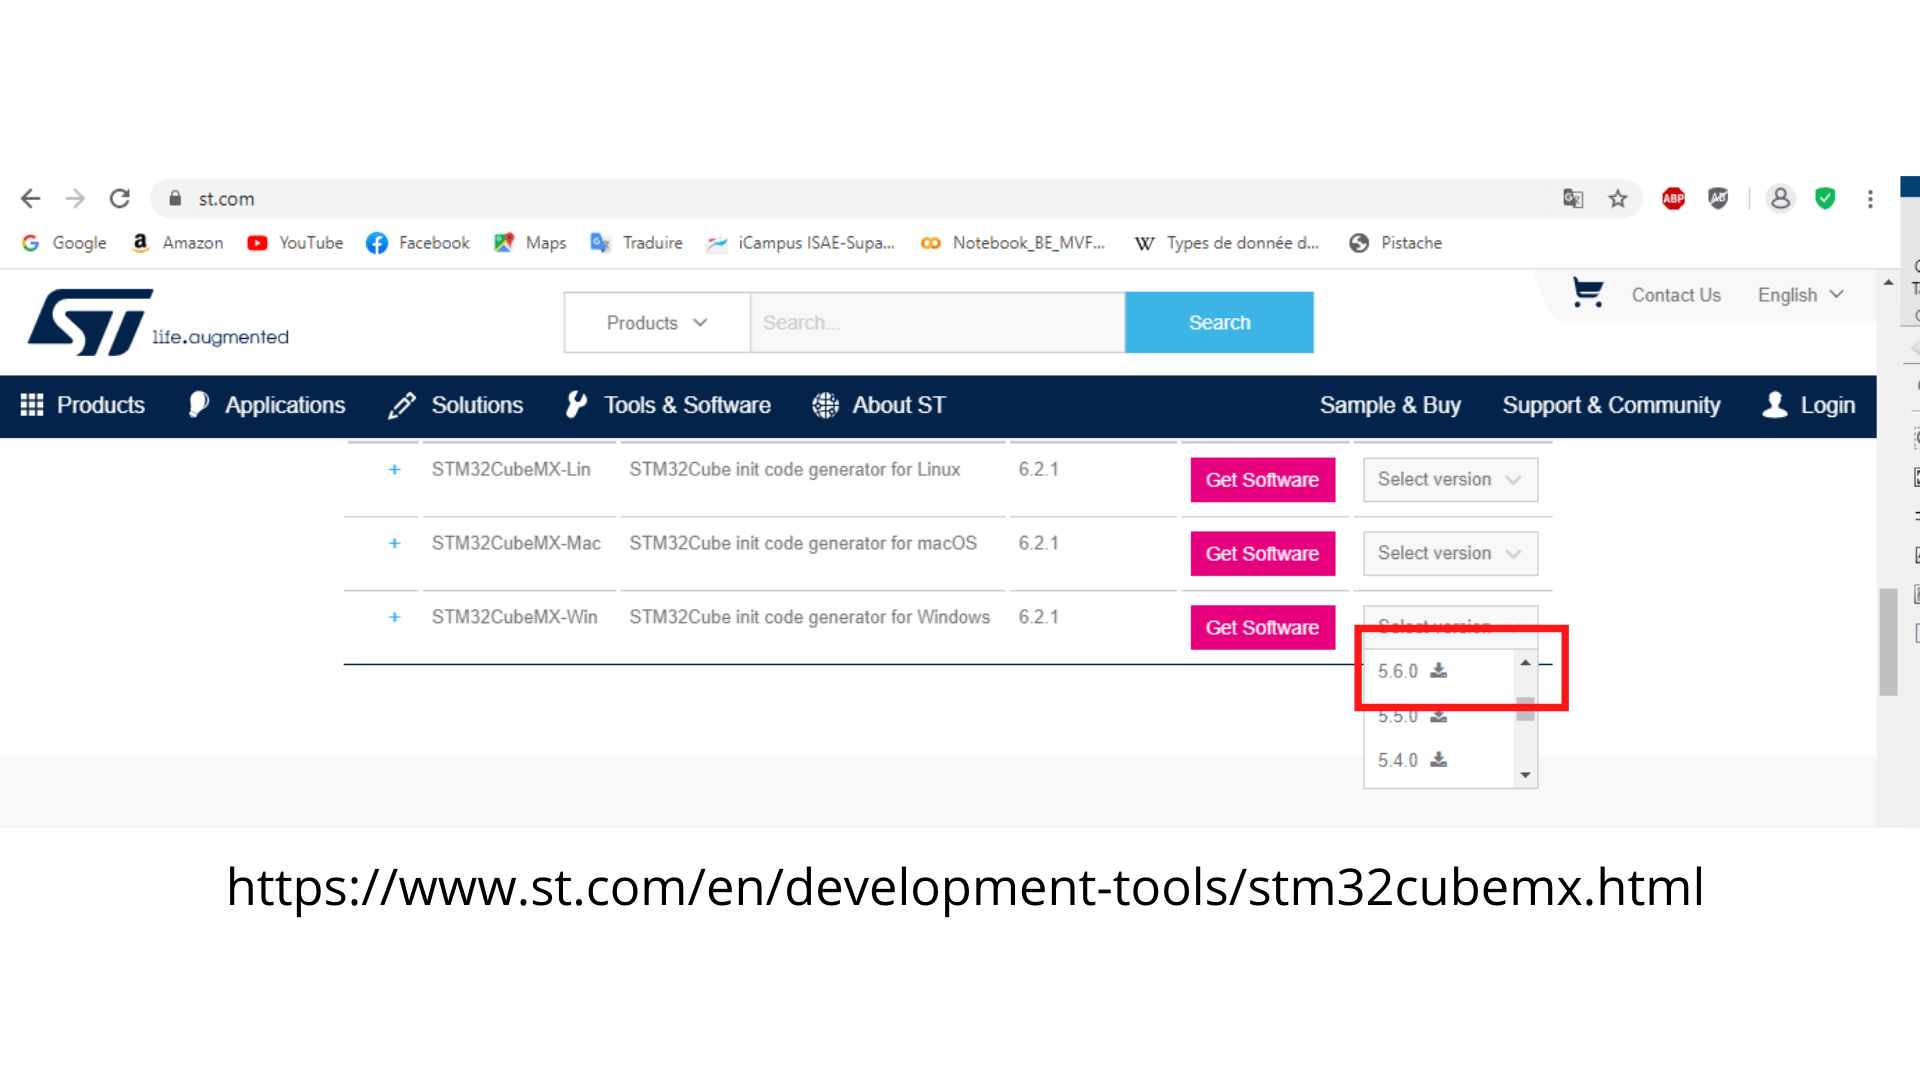
- STM32CubeMX (v5.6.0)
- STM32CubeIDE (v1.6.0)
STM software installation
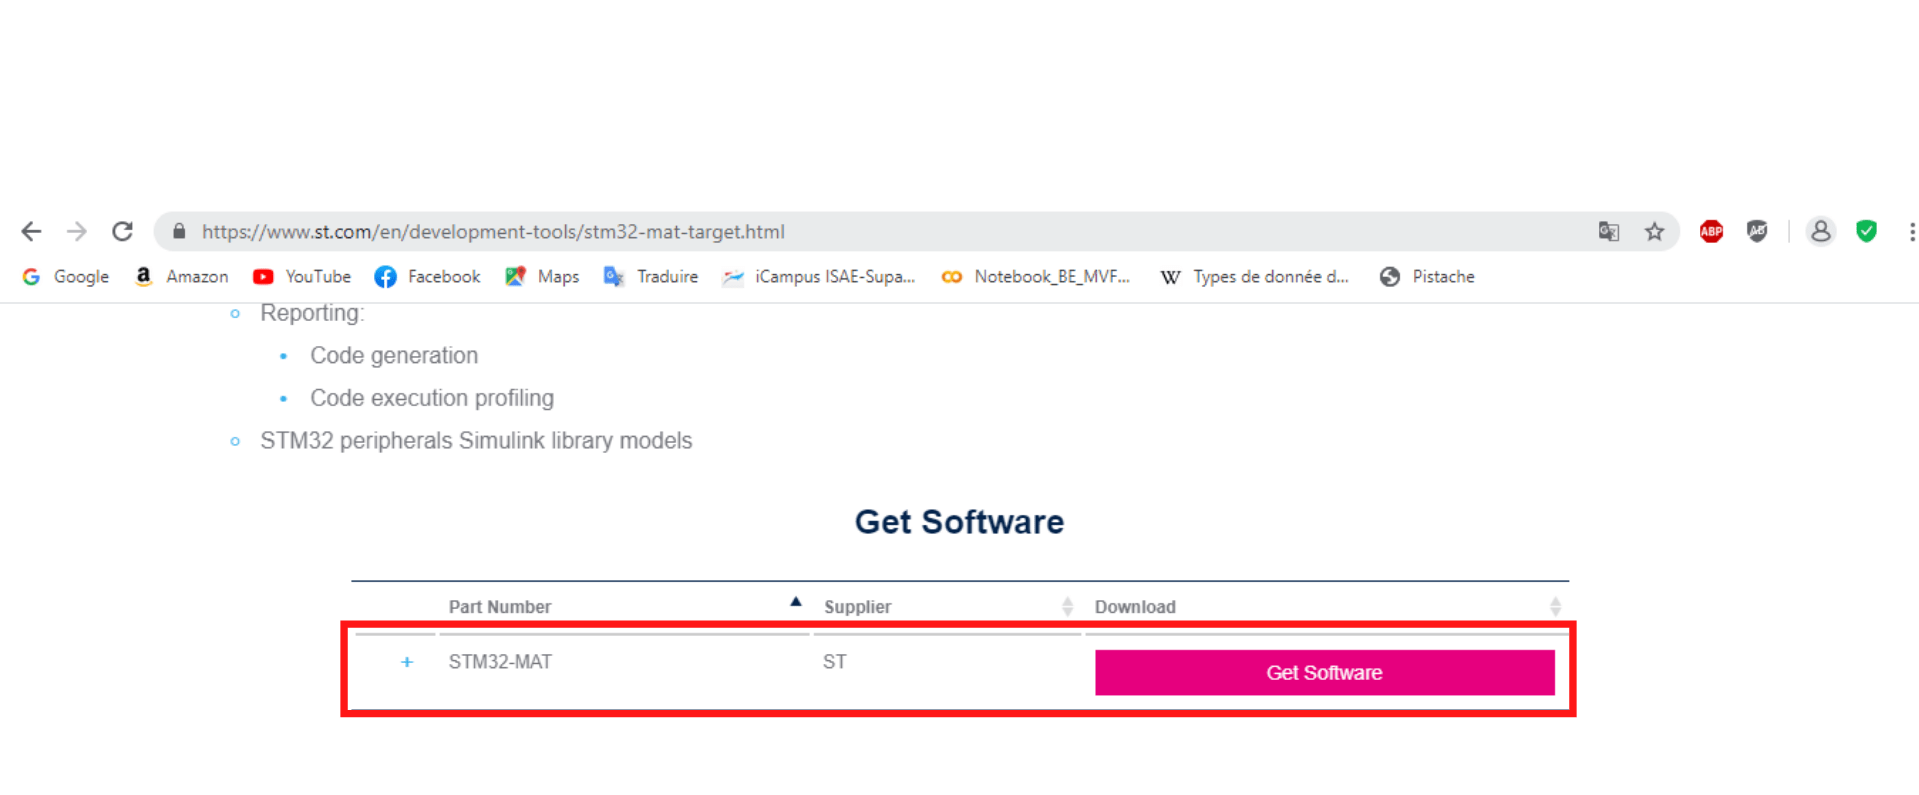
In order to implement the C code generated by Simulink on the microcontroler, you will need some of the STM32 software. They are all available for free on the ST website, you may need to create an account to download them all.
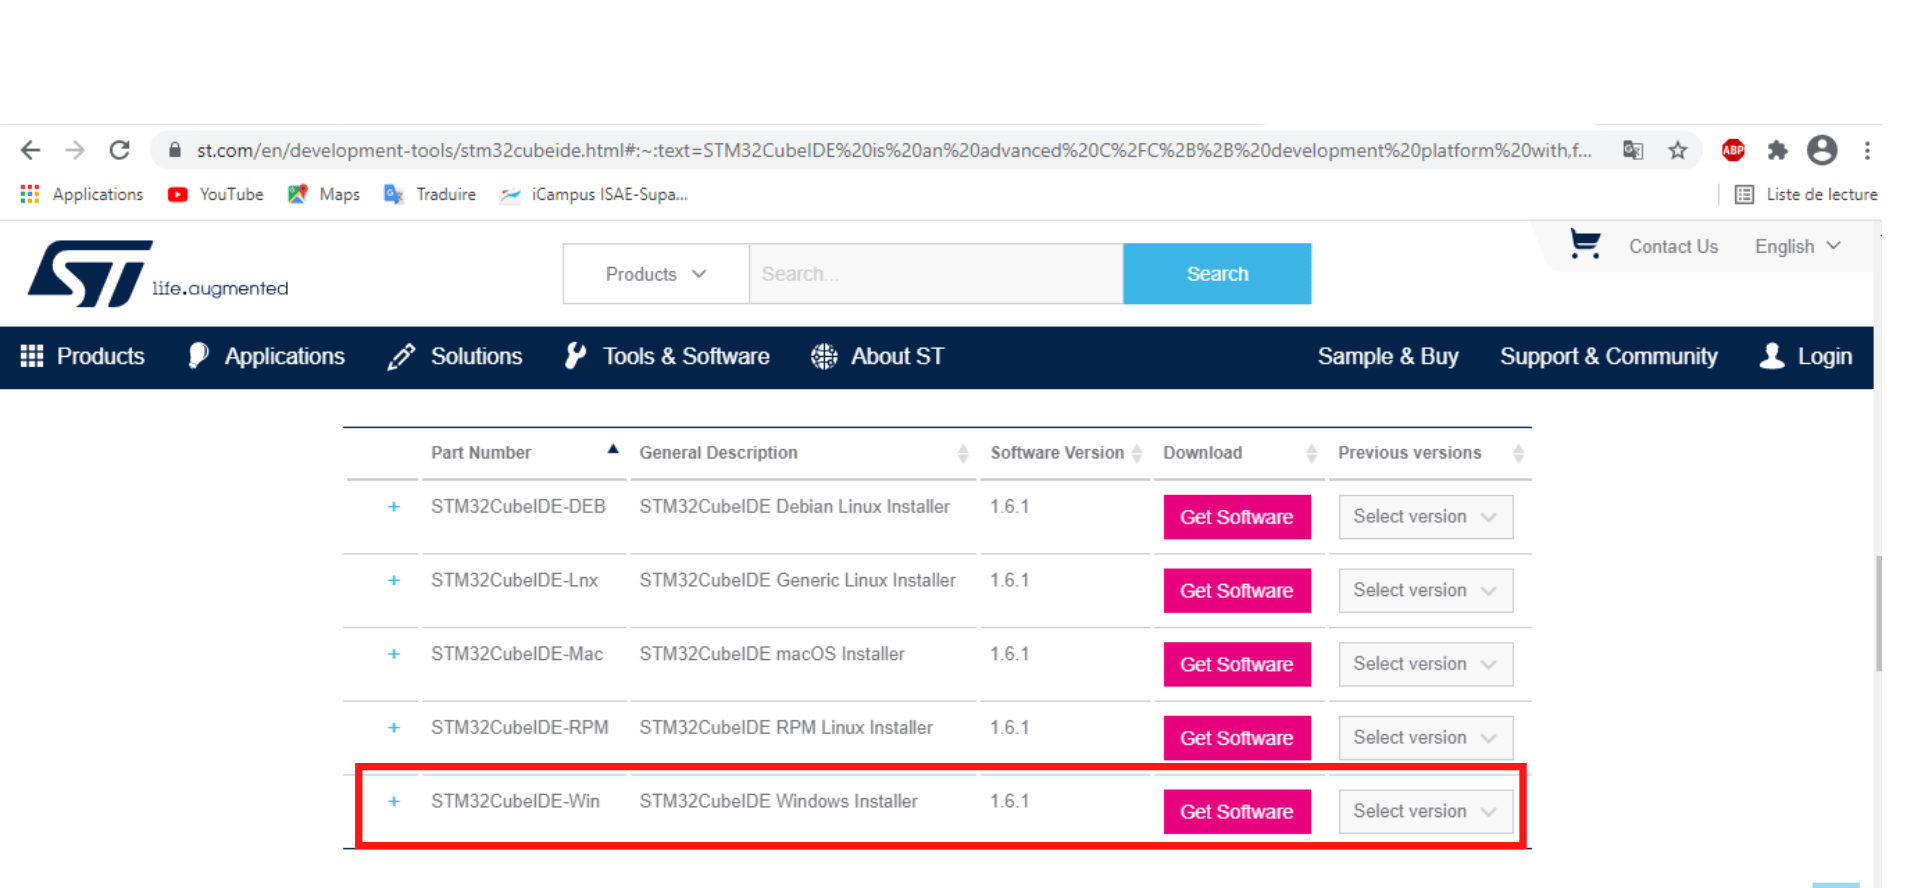
Concerning STM32CubeMX I couldn't work it out with the 6.2 version so I advise you to download the 5.6 version. However feel free to send us suggestions to make it work with more recent versions.
Personally I have installed them all in a ST folder in Program, just make sure to remember where you put them because you will need to copy their path.
Our first program
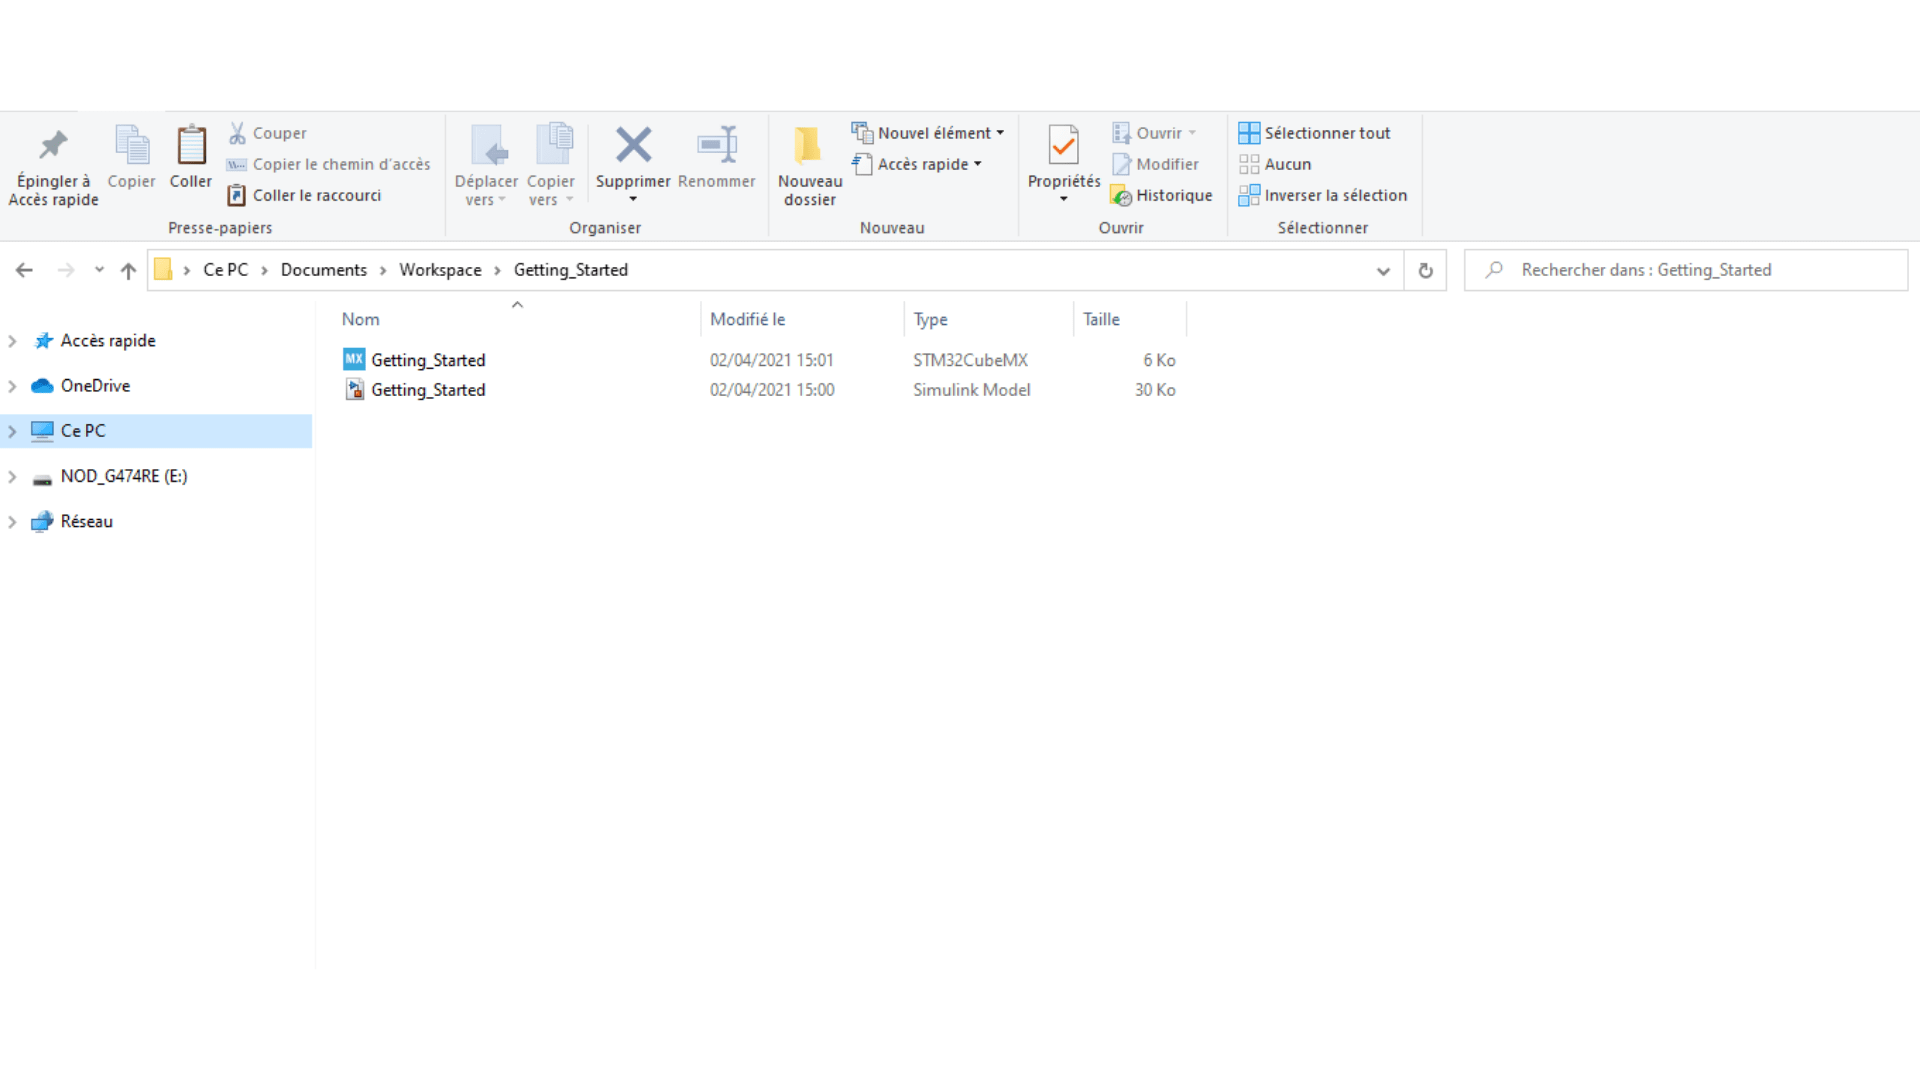
Fortunately, STM32 Mat/Target provides a simple example of a Simulink model with its associated CubeMX file which makes a LED blinking by using an interrupt routine based on Timer1.
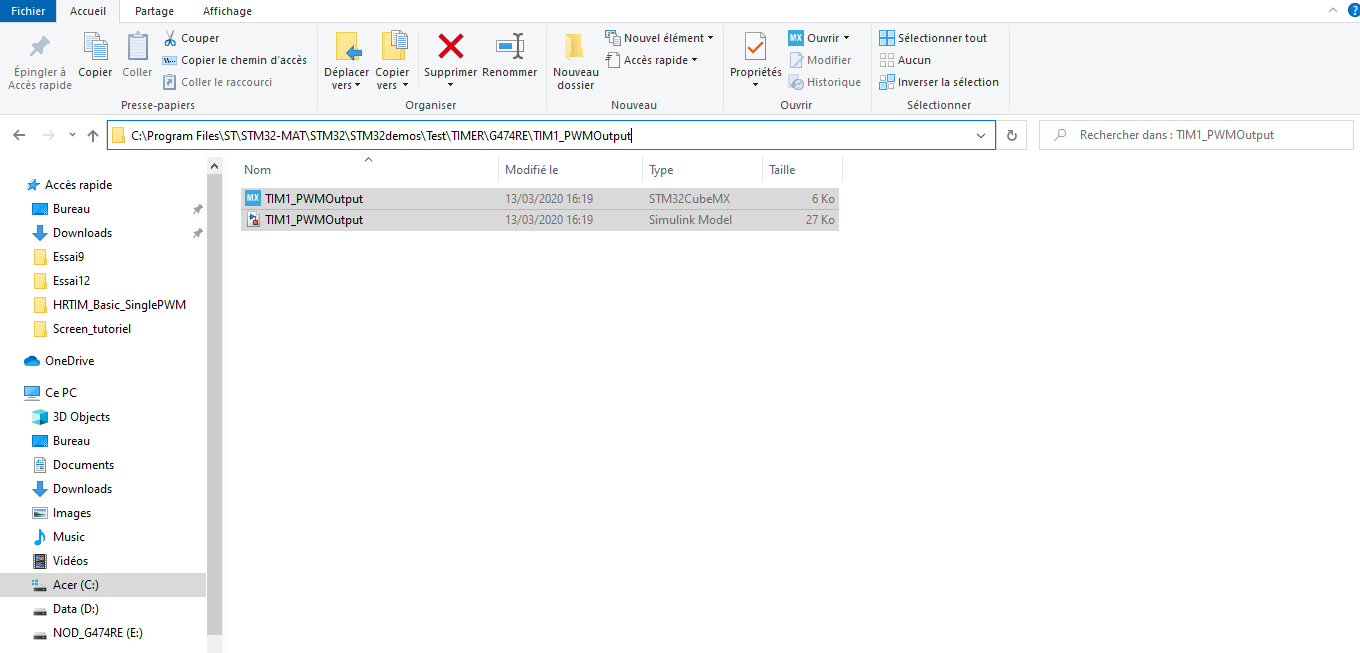
Copy these files in a Getting_started folder in a Workspace folder. This arrangement will be useful to use cubeIDE.
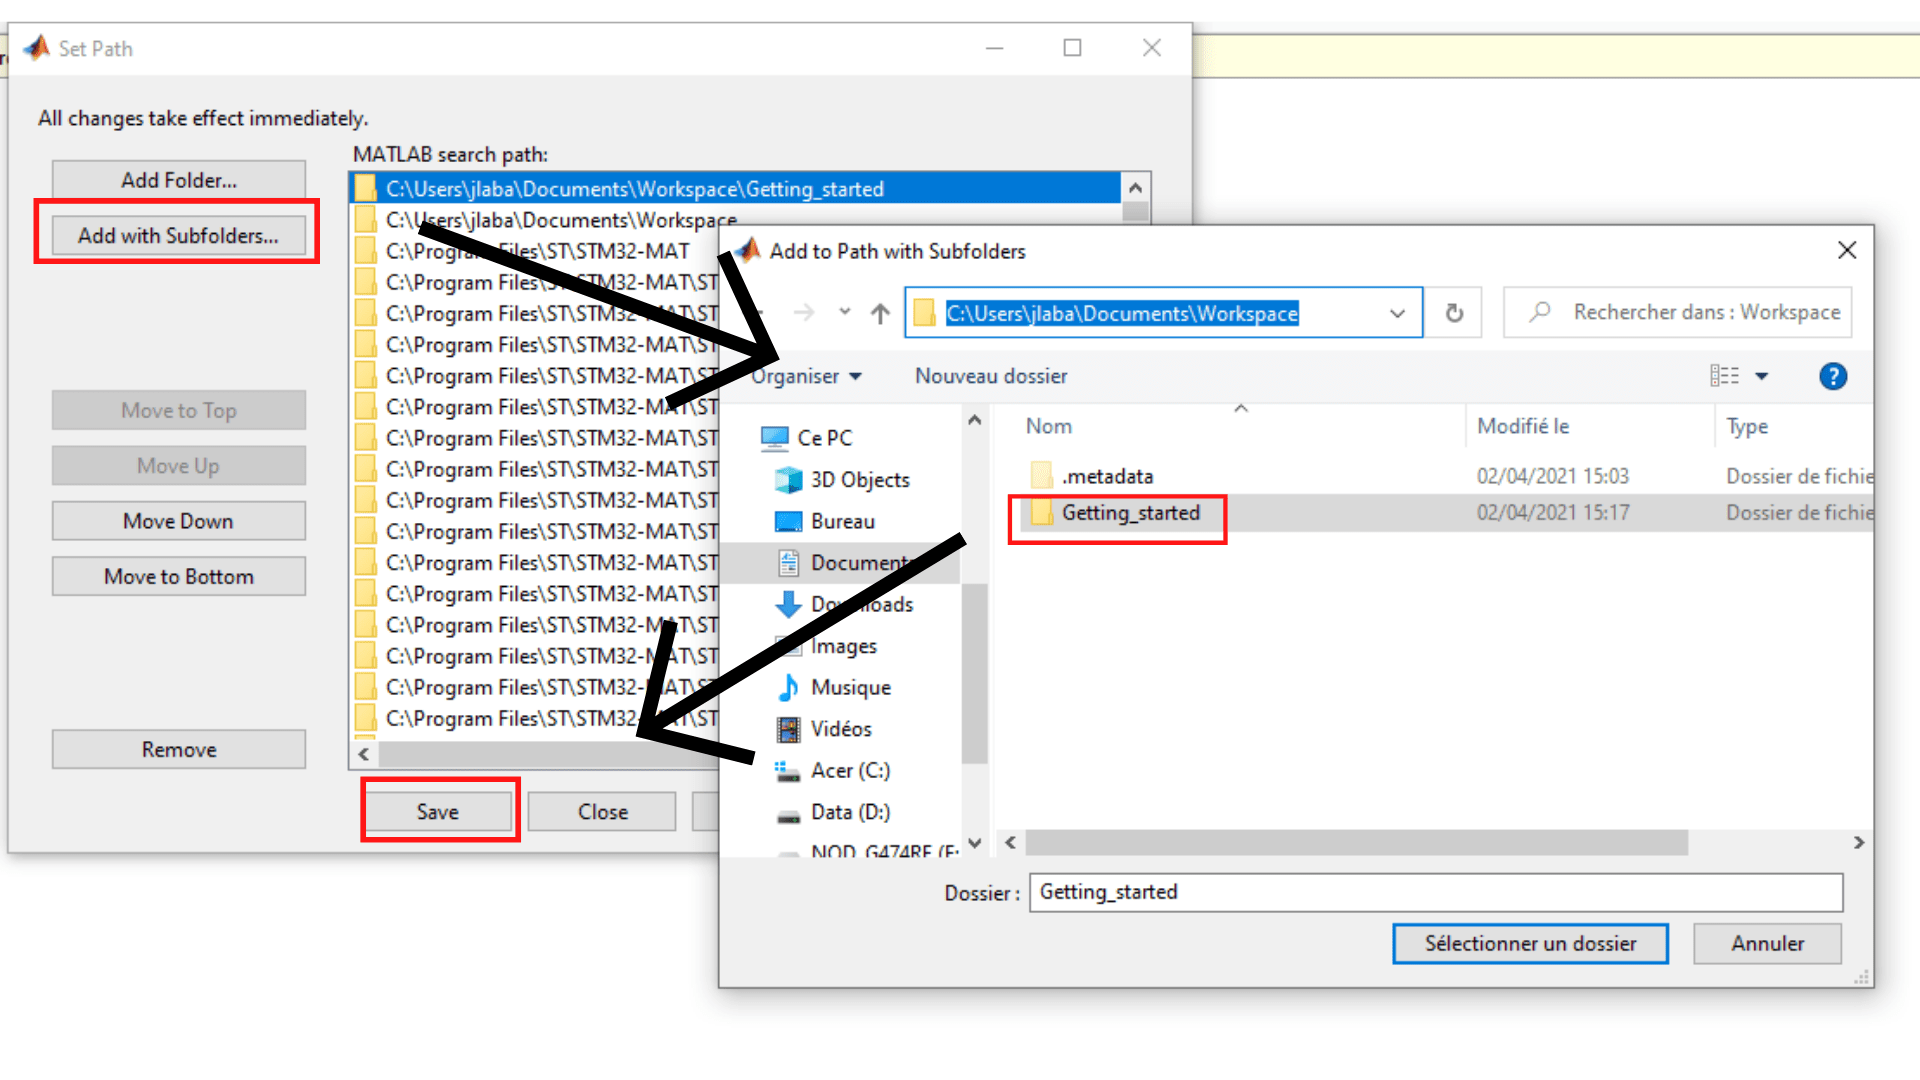
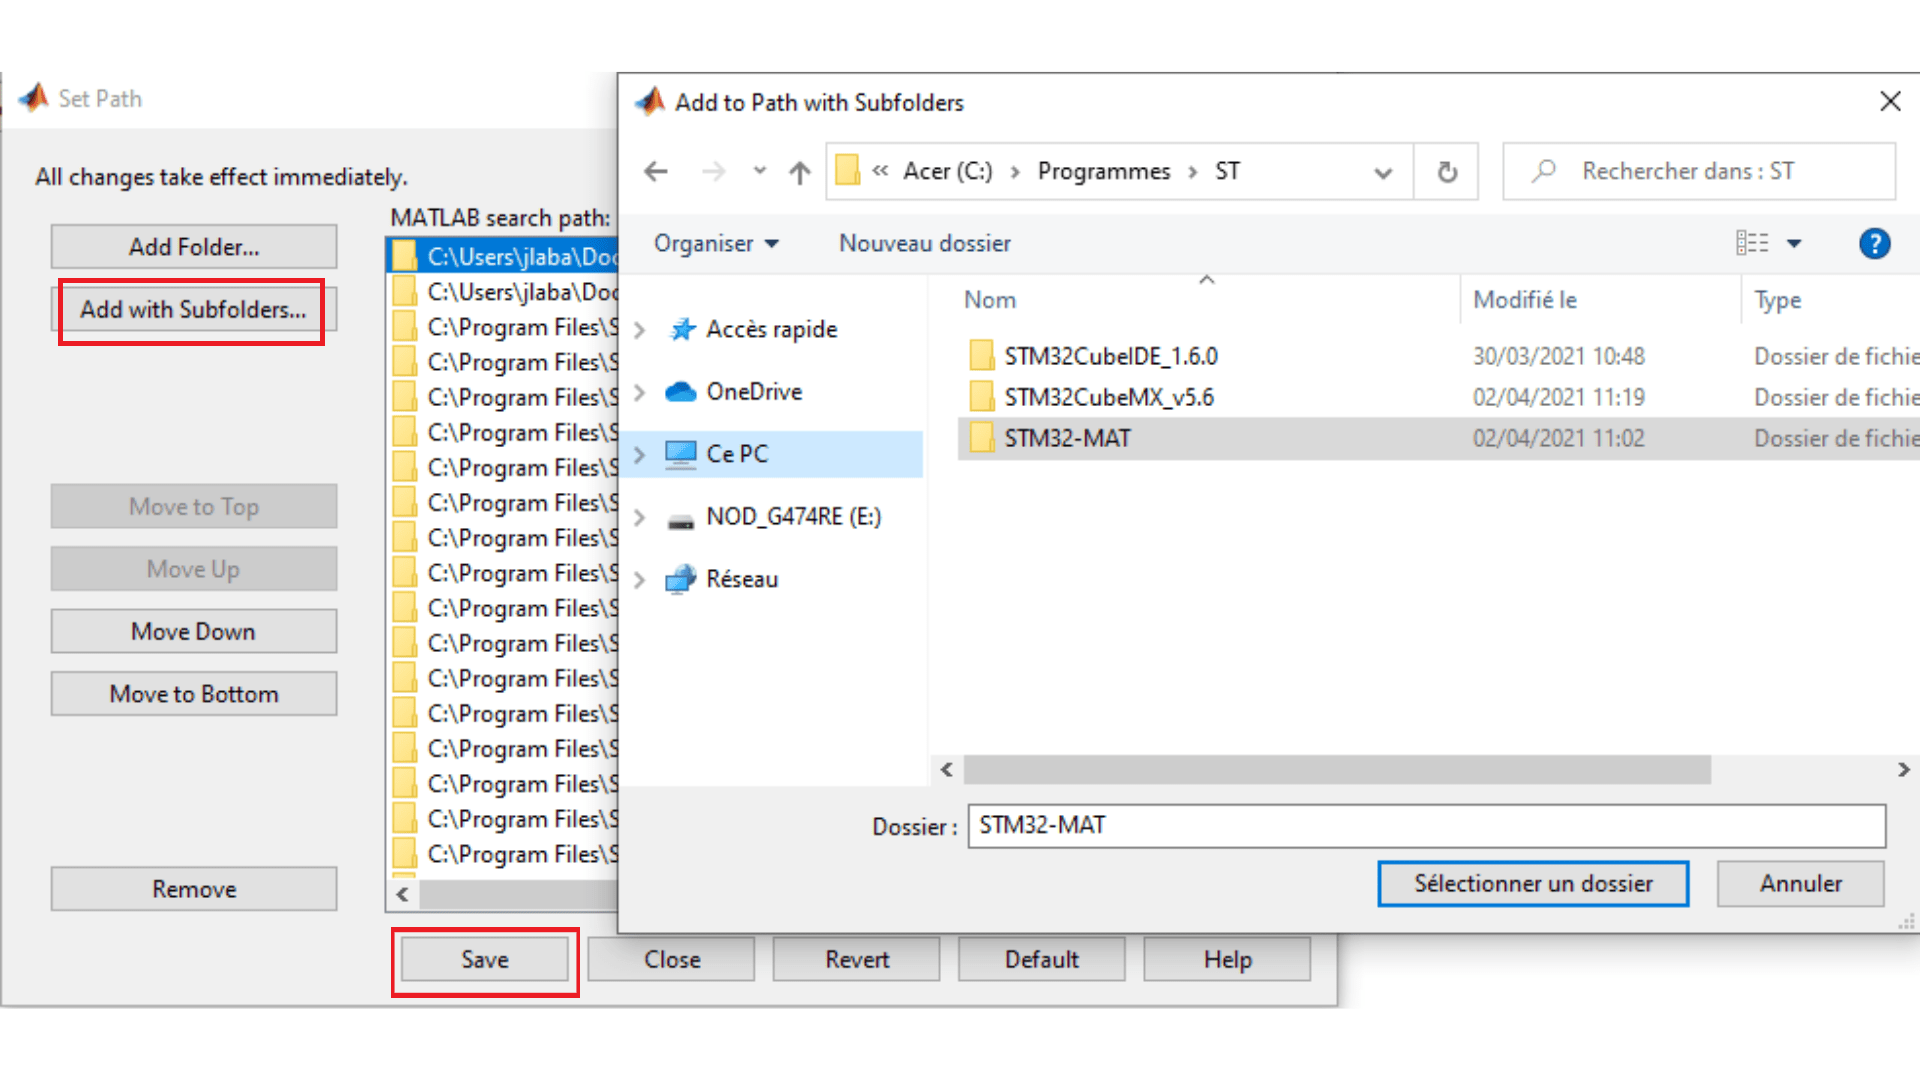
Now you can open Matlab and add Getting_started to your path with set path. Add STM32 Mat/Target to your path as well.
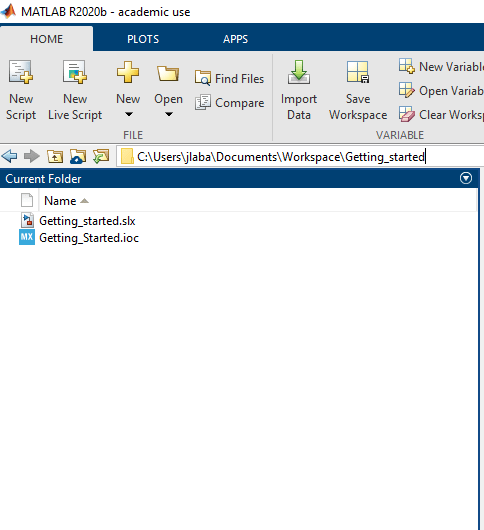
The code generation will produce multiple files, so make sure to be located in the Getting_started folder when you use Simulink.
Once you've opened the Simulink model a few settings are to be changed.
Open the configuration window in Modeling>Model settings>Model Settings (or Ctrl + E):
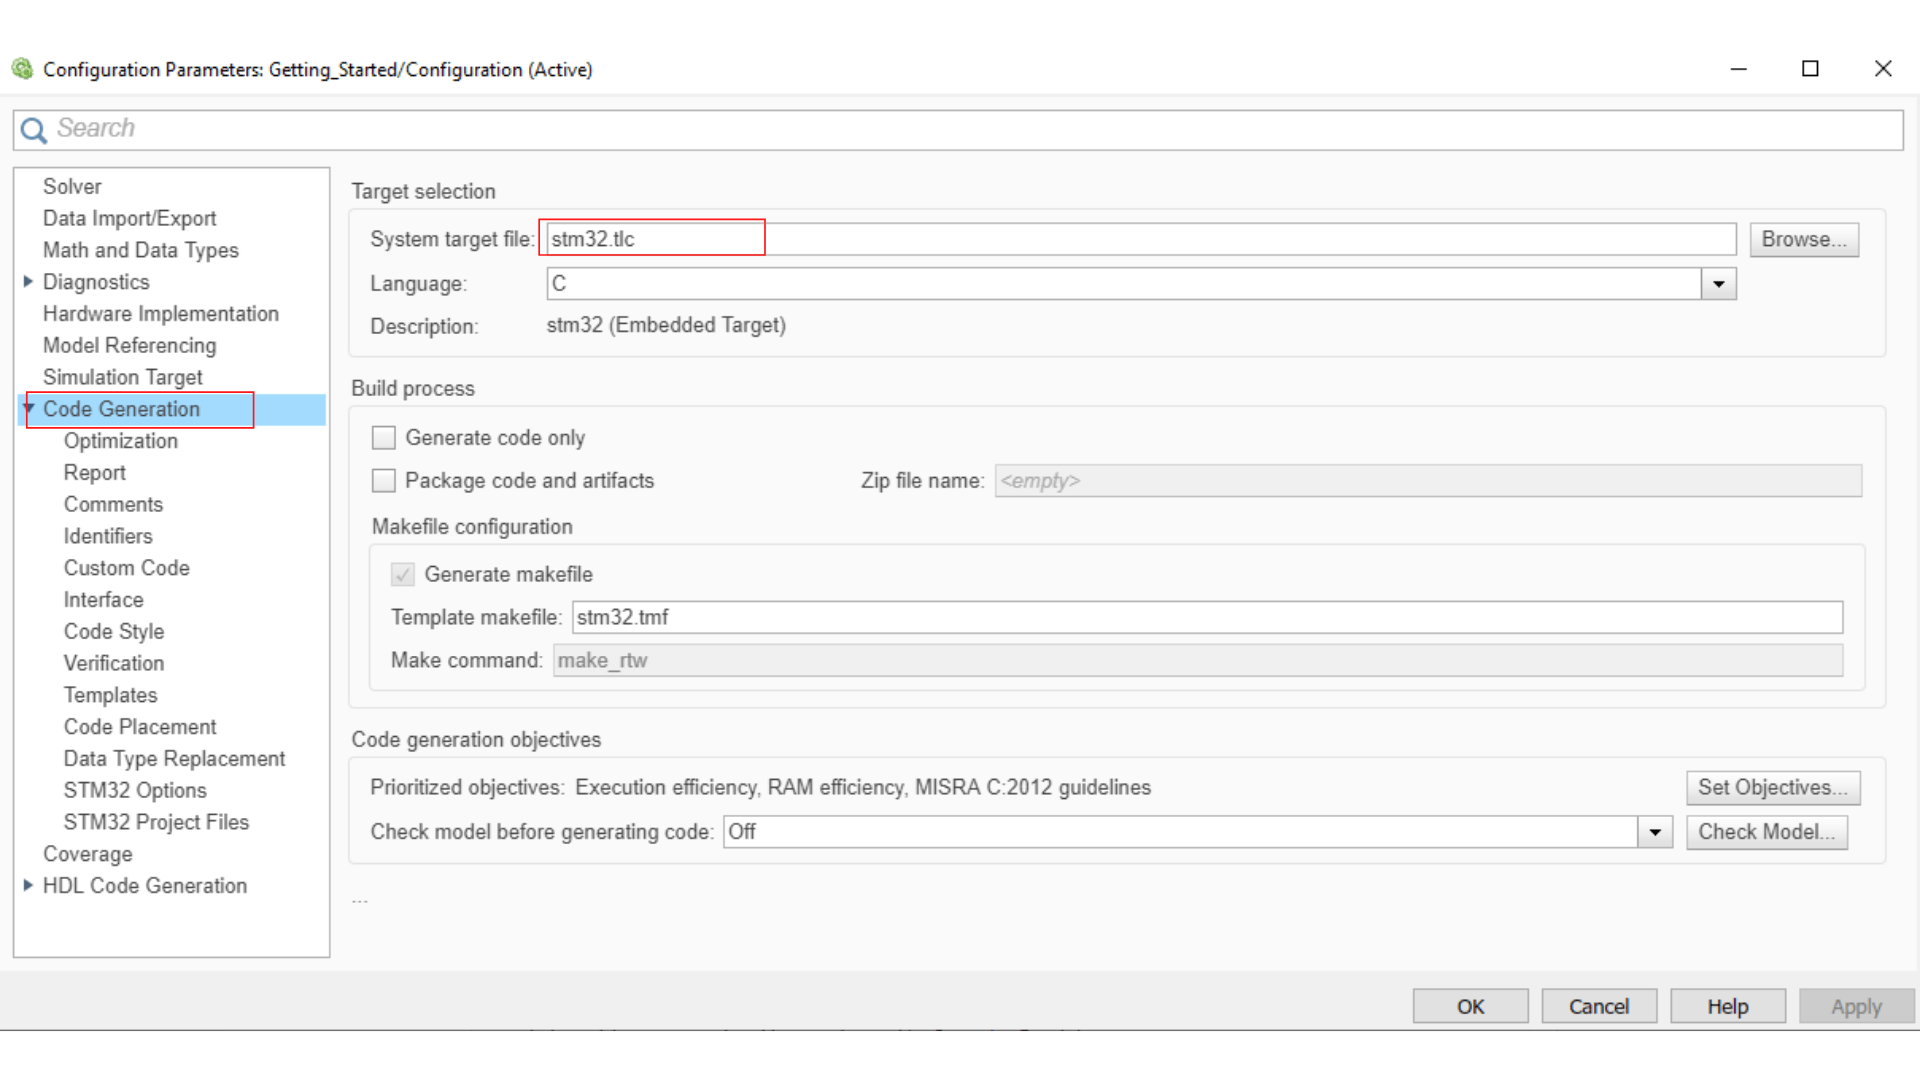
- In Code generation set System target file on stm32.tlc.
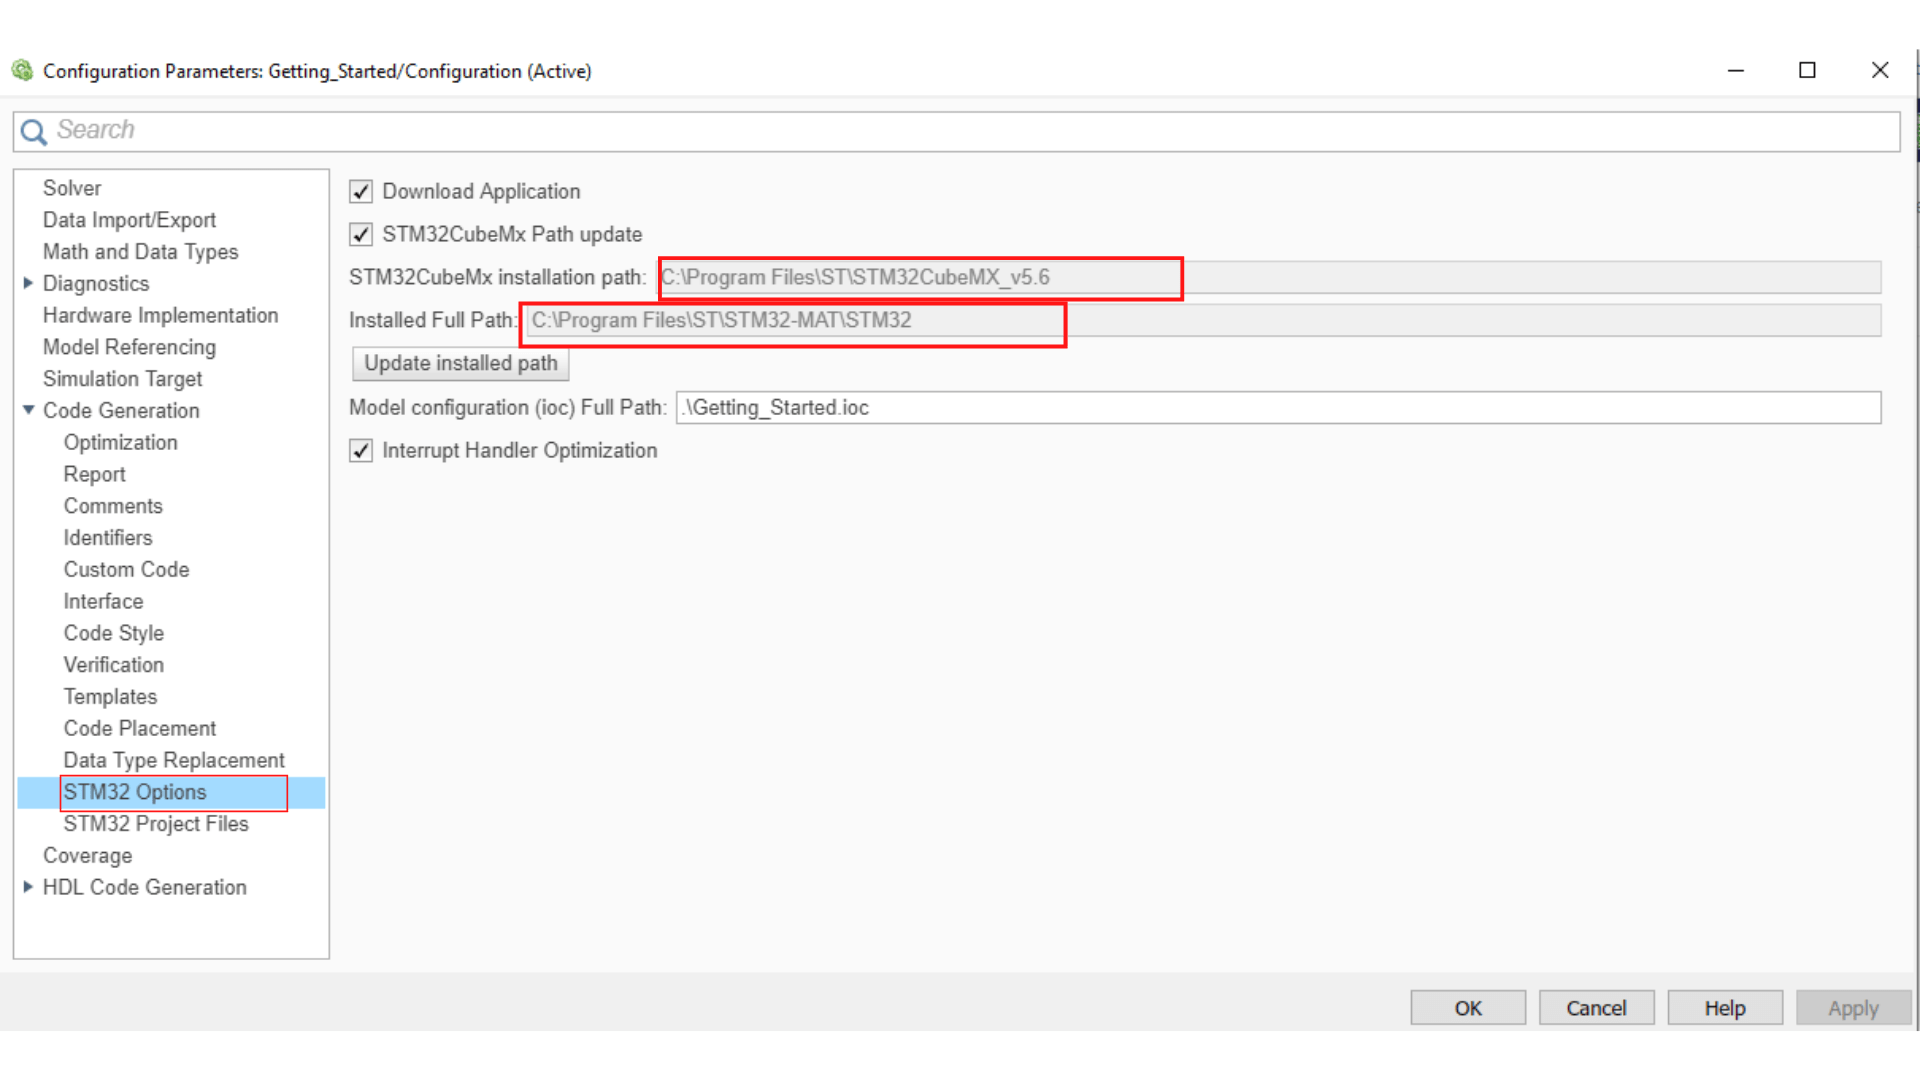
- In Code generation>STM32 options update installed path. If it doesn't work automatically copy paste the paths to STM32cubeMX and STM32 Mat/Target.
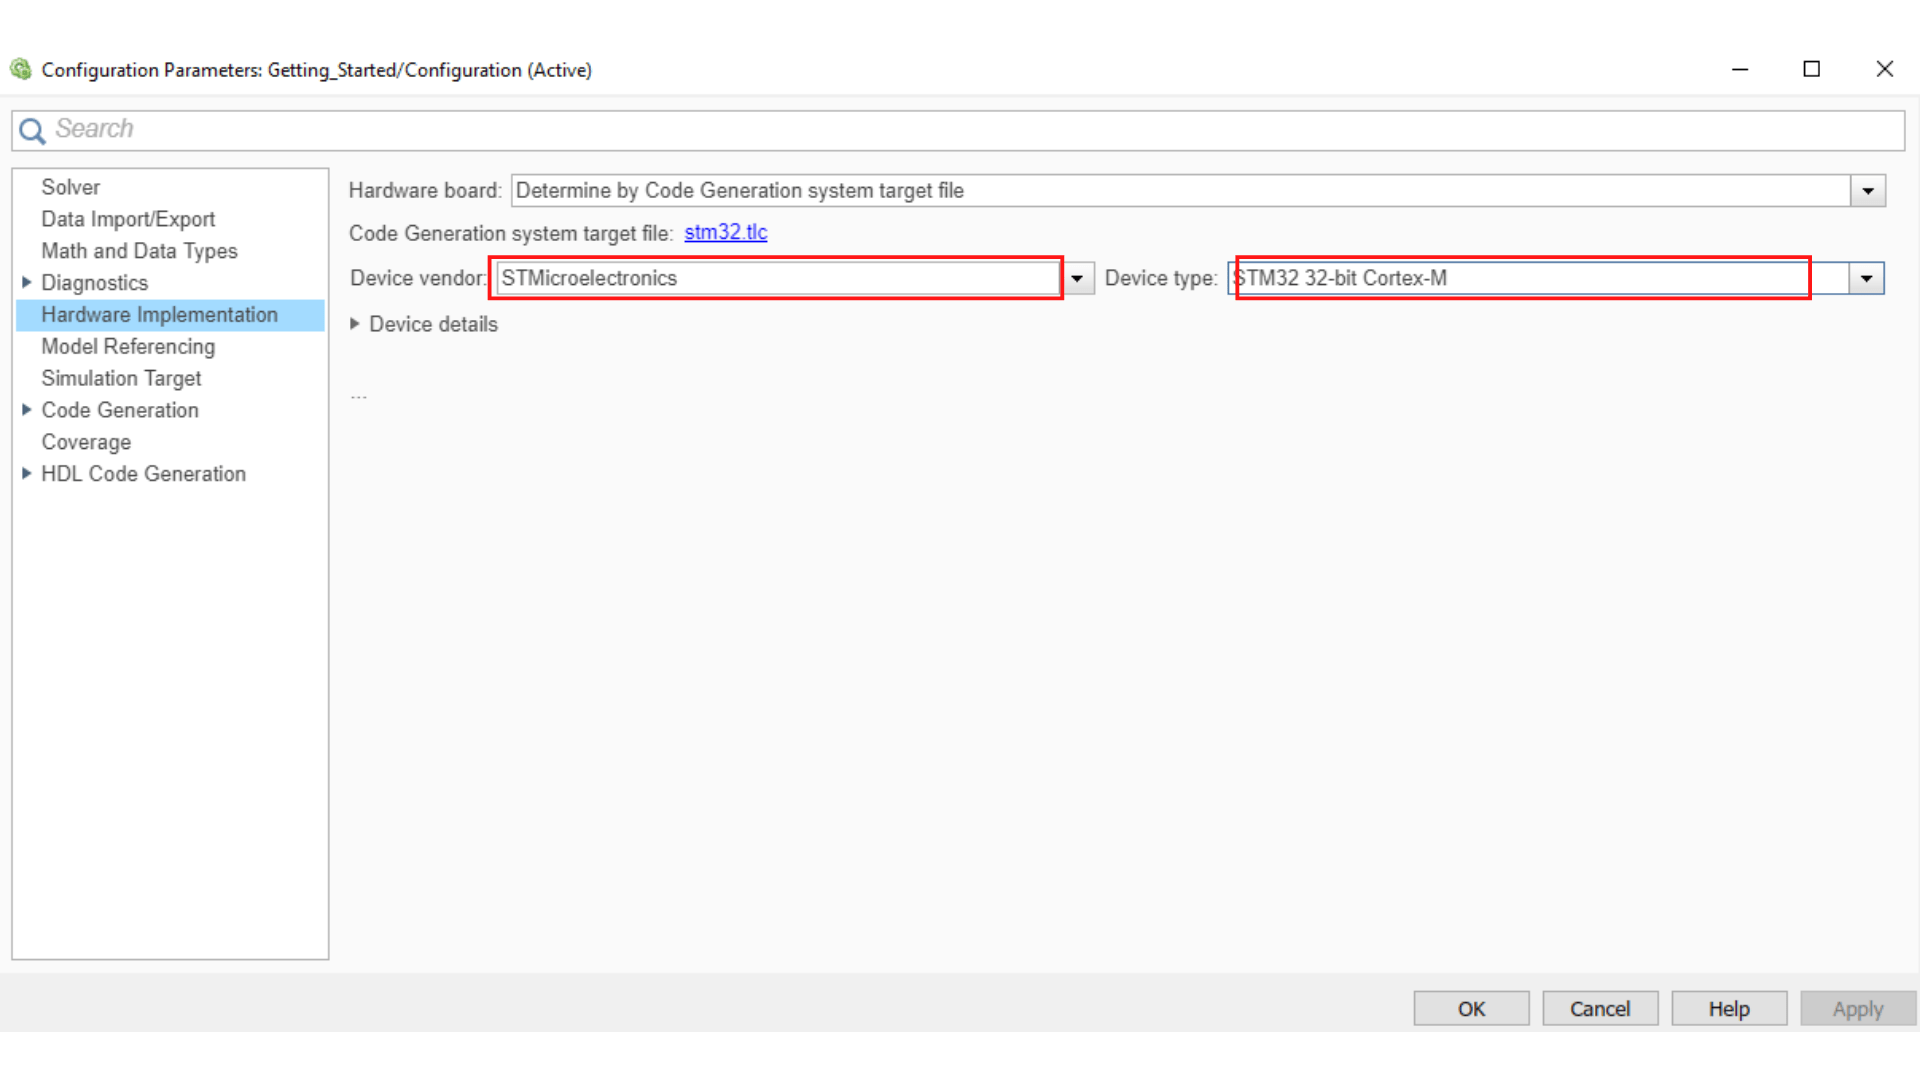
- In Hardware Implementation make sure you selected "device vendor" : STMicroelectronics ; "Device type" : STM32 32-bits Cortex-M
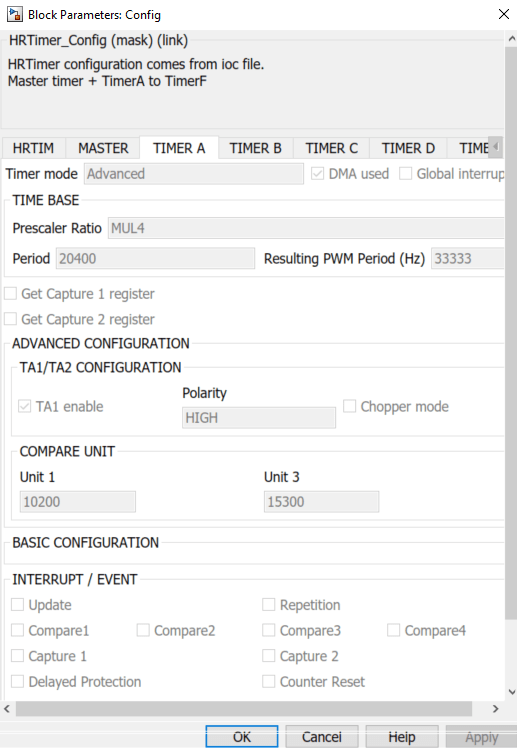
Double click on the STM32_Config block and select the Getting_started.ioc file.
This will open a STM32CubeMX window in which you can configurate the ioc file. In the tab Project manager>project set "Toolchain/IDE" on STM32CubeIDE and save your file.
Once these changes done, don't forget to save your Simulink and your CubeMX files.
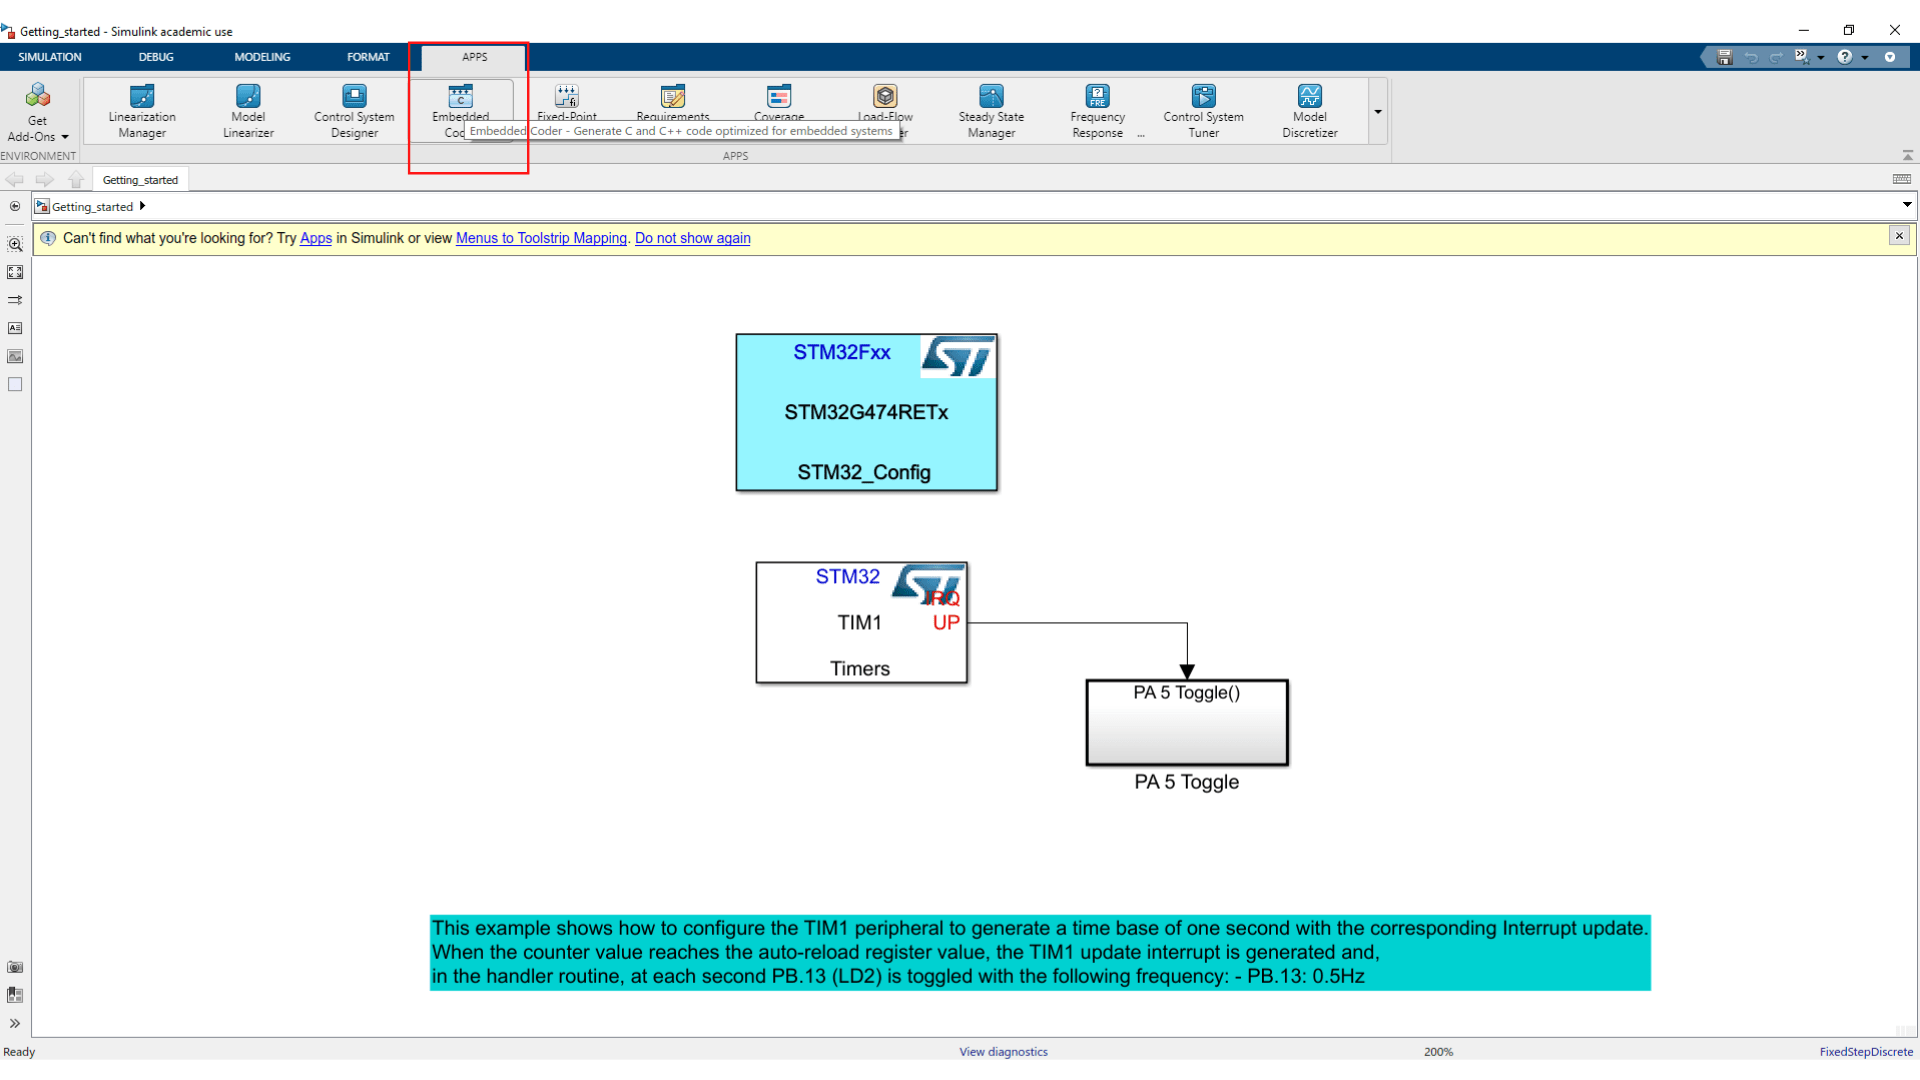
You can now open the C code tab by clicking on Embedded Coder in the Apps tab, and finally generate the code with C code>Build.
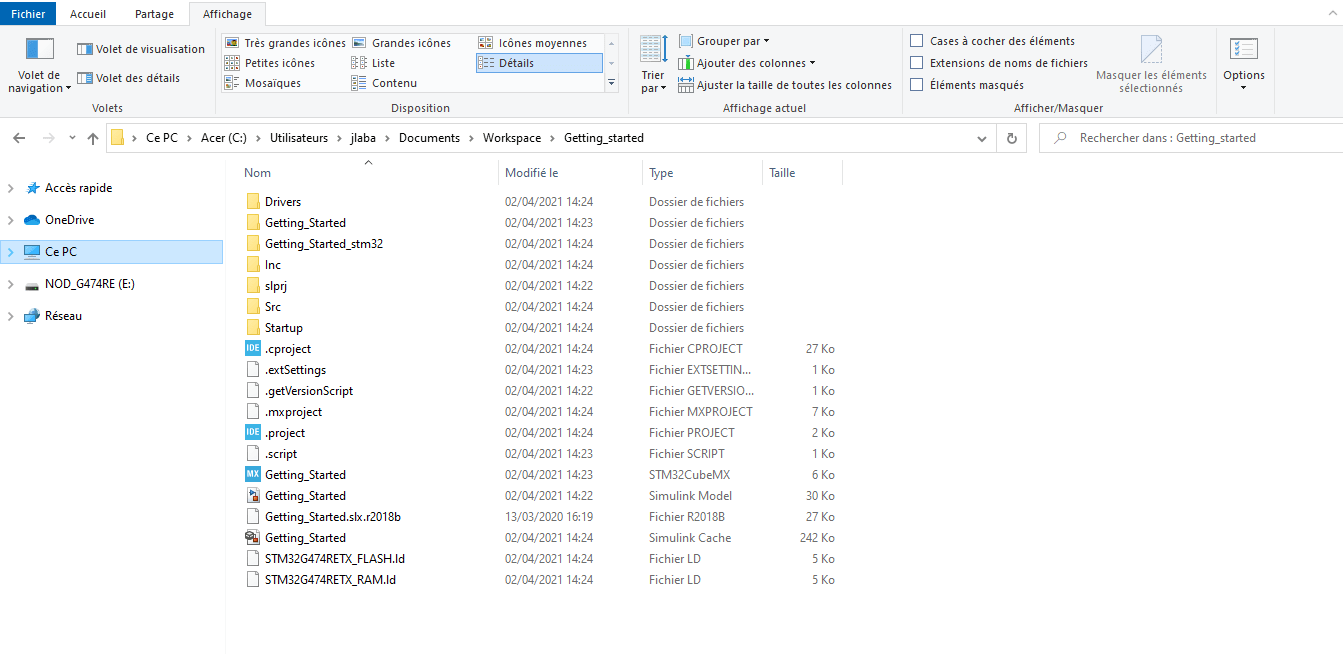
Even for this simple task the code generation can be quite long. When it's done, your Getting_started folder should look like this.
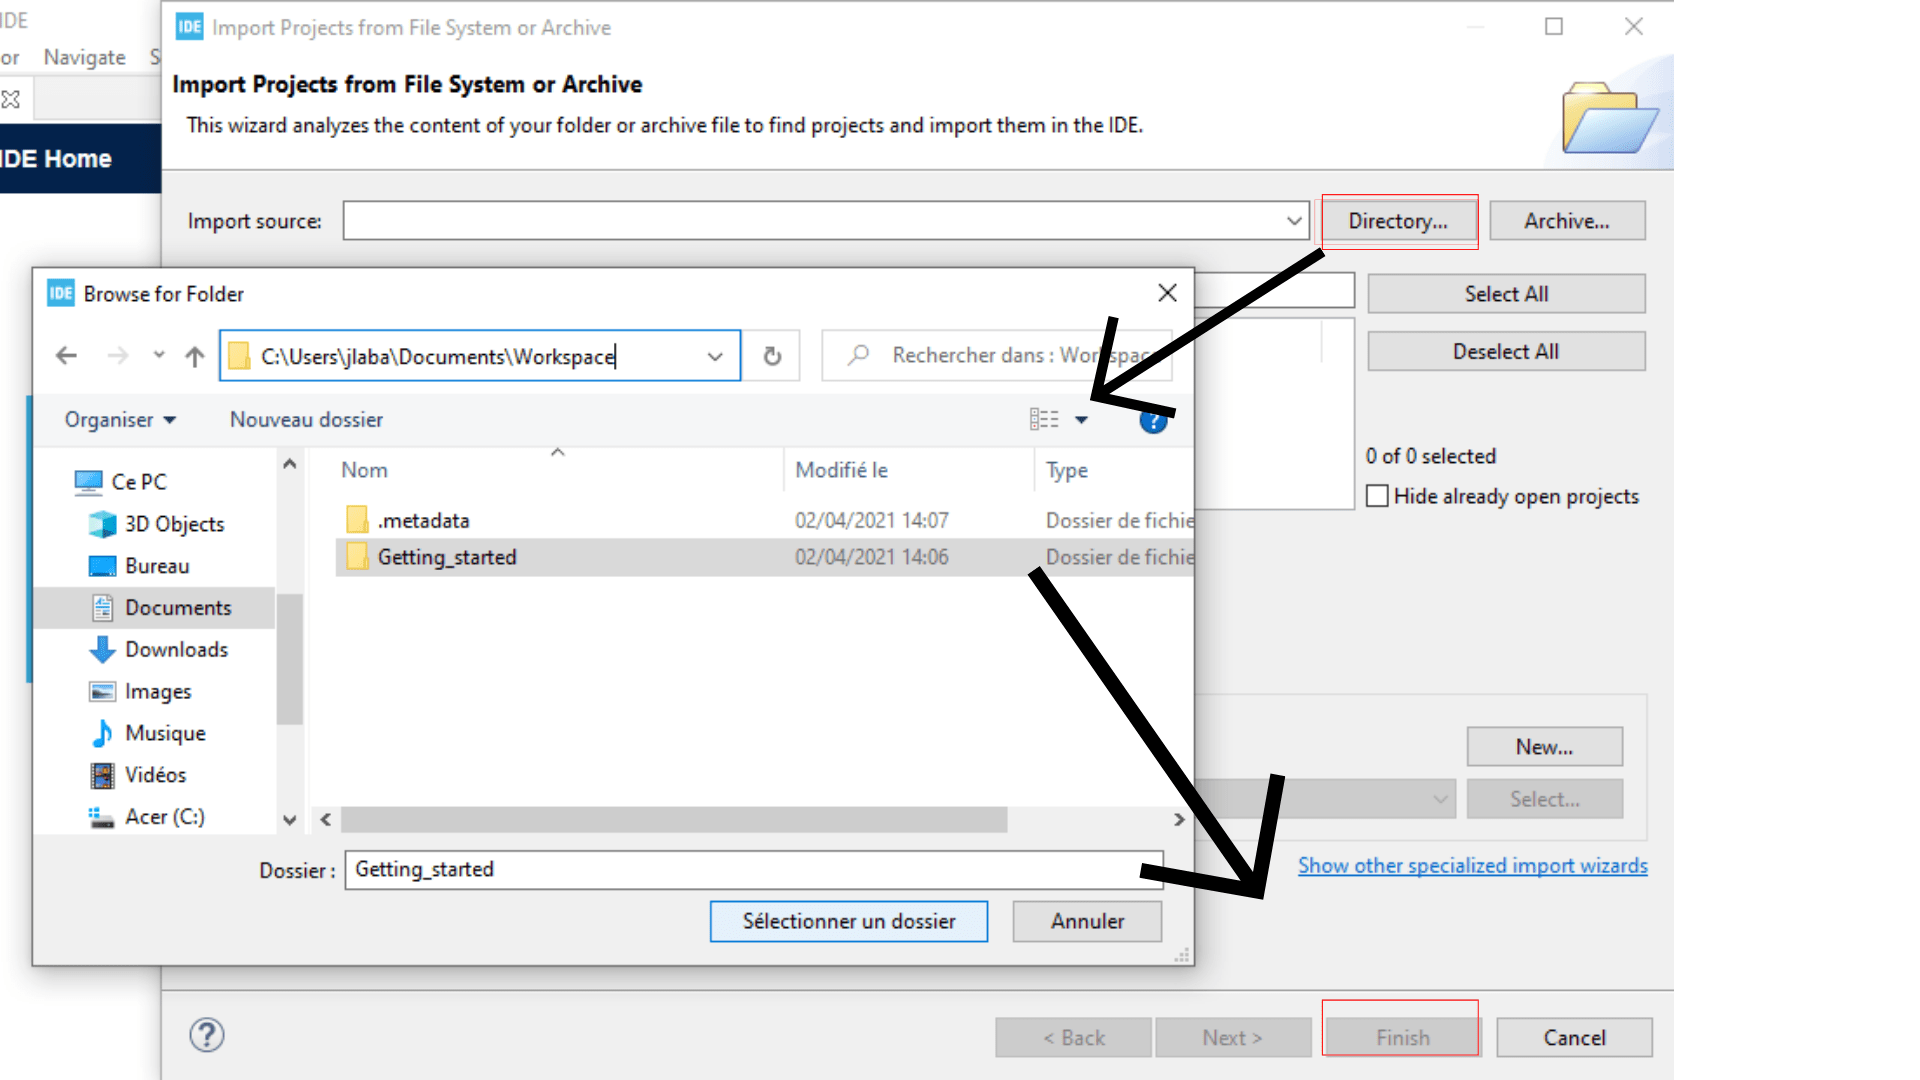
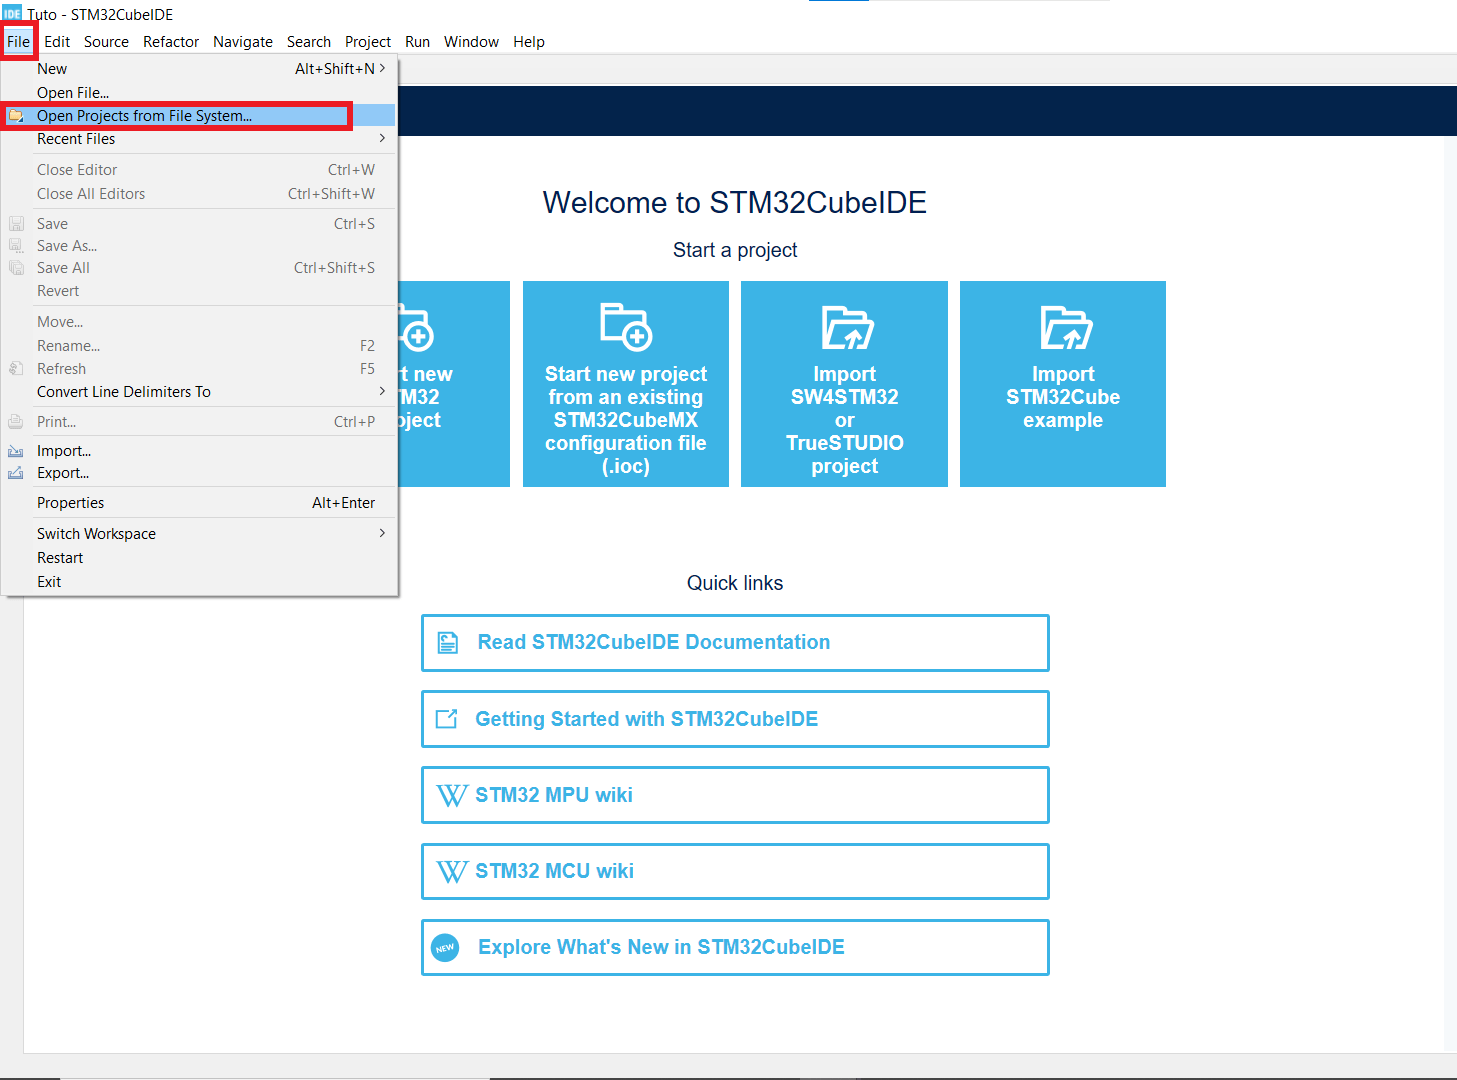
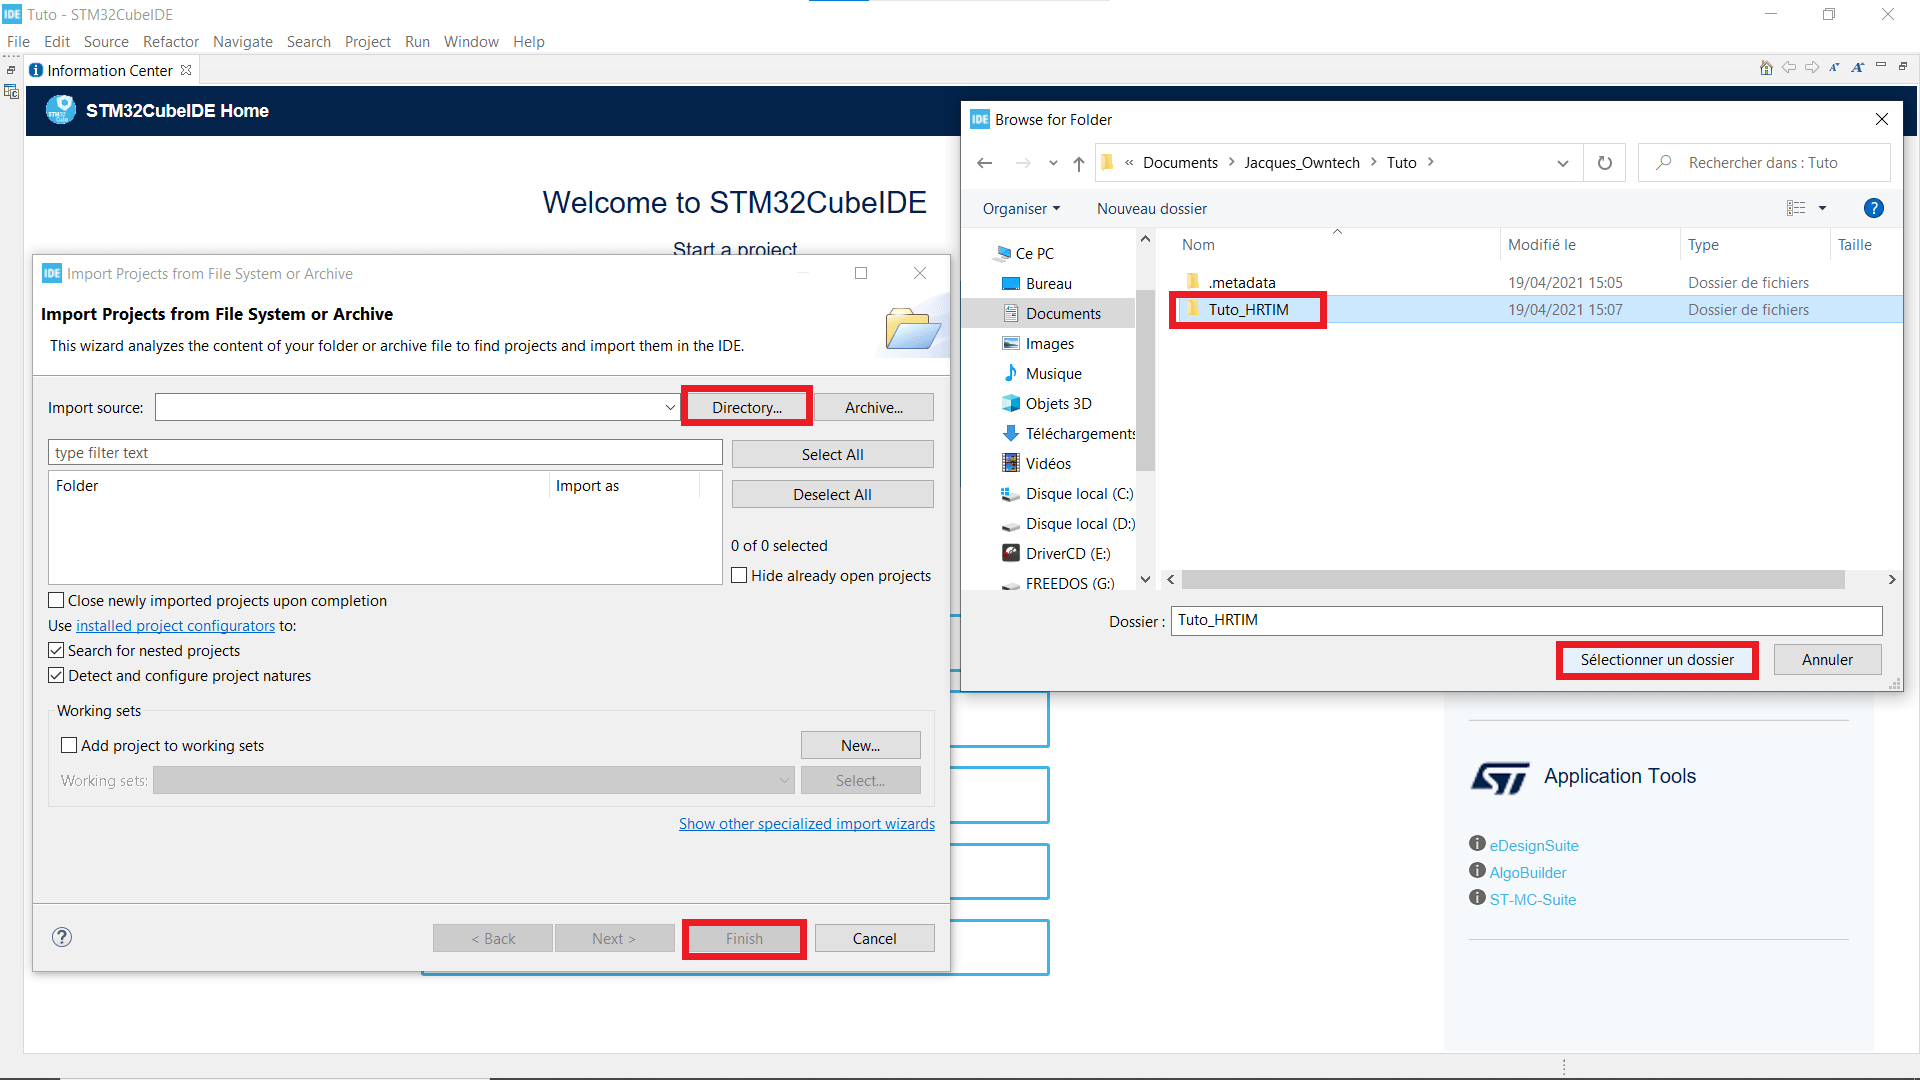
Launch STM32CubeIDE and select Workspace as your workspace. Open Getting_Started as a IDE project via file>Open Projects from file system.
Right-click on the Getting_started file within the project and then Properties>C/C++ Build to untick the "Exclude ressource from build" box.
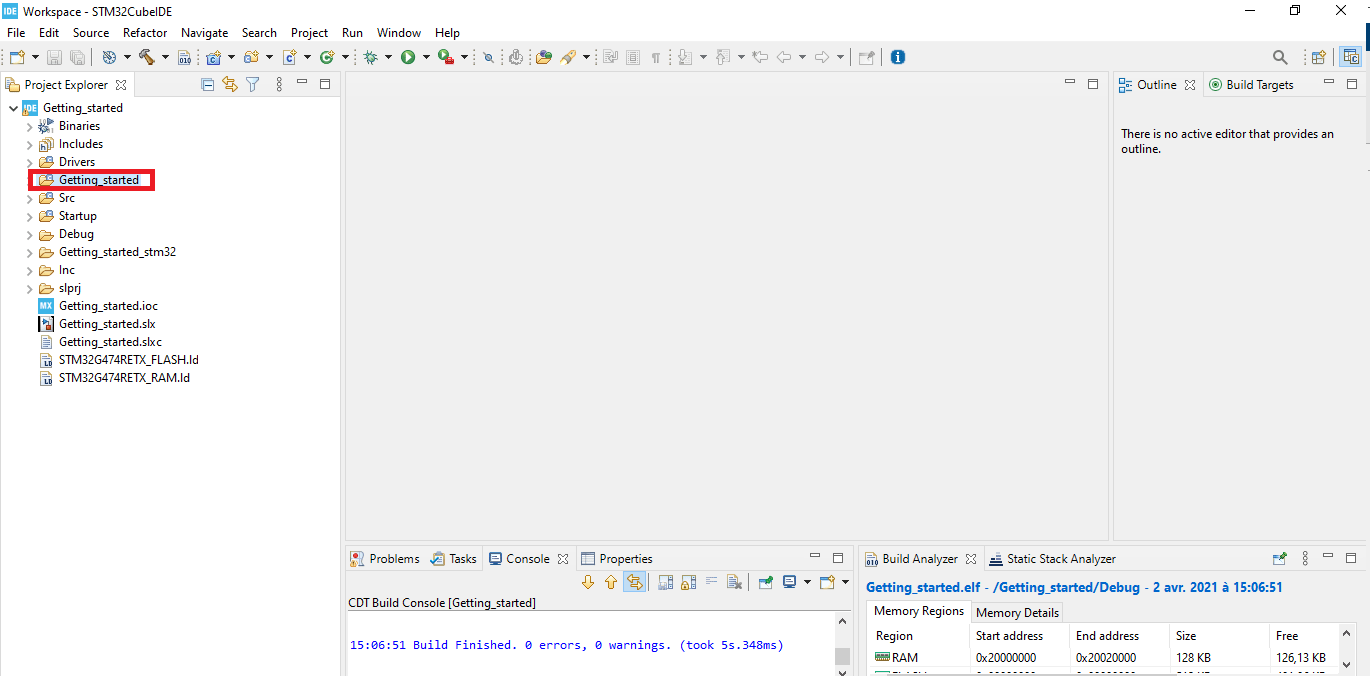
Now your can build then run the code.
After a downloading time during which the LD1 blinks (it's a part of the integrated debugger, nothing to do with your code) , the program is executed on the microcontroler and the LD2 blinks at the frequency defined in the Simulink model.

Sketch of the Nucleo-G474RE